This post may contain affiliate links. Please read my privacy policy.
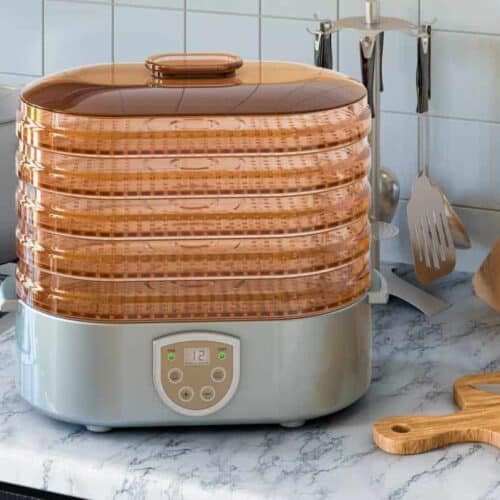
Do you need a dehydrator or a smoker to make beef jerky? No, so don't go running out and buying expensive appliances. Start with an appliance everyone already has, an oven!
This is the no dehydrator beef jerky recipe! Using the oven to make beef jerky is a very easy, simple, and cost effective way to make great tasting jerky.
This post may contain affiliate links. Please read my privacy policy.
Jump to:
🥩 Choosing and slicing the meat
1 - Start by buying a lean piece of meat, I am using flank steak for this recipe. Flank steak is not my favorite cut of meat to use, mainly because it produces less tender jerky. The flank steak I have access to here in Austin has a little more marbling than I like and is also about twice as expensive as my favorite cut; beef eye of round.
2 - Trim any visible fat from the meat. Fat will make your jerky spoil, so cut off as much as possible.
3 - Wrap the meat in plastic wrap and place in the freezer for about 1-2 hours to partially freeze. Freezing is not mandatory, but does make slicing the meat at a consistent width easier. Slice against the grain at around ⅛″-¼″ thick. When using flank steak, I have found that wider slices allow the jerky pieces to stay together better and produce better jerky.
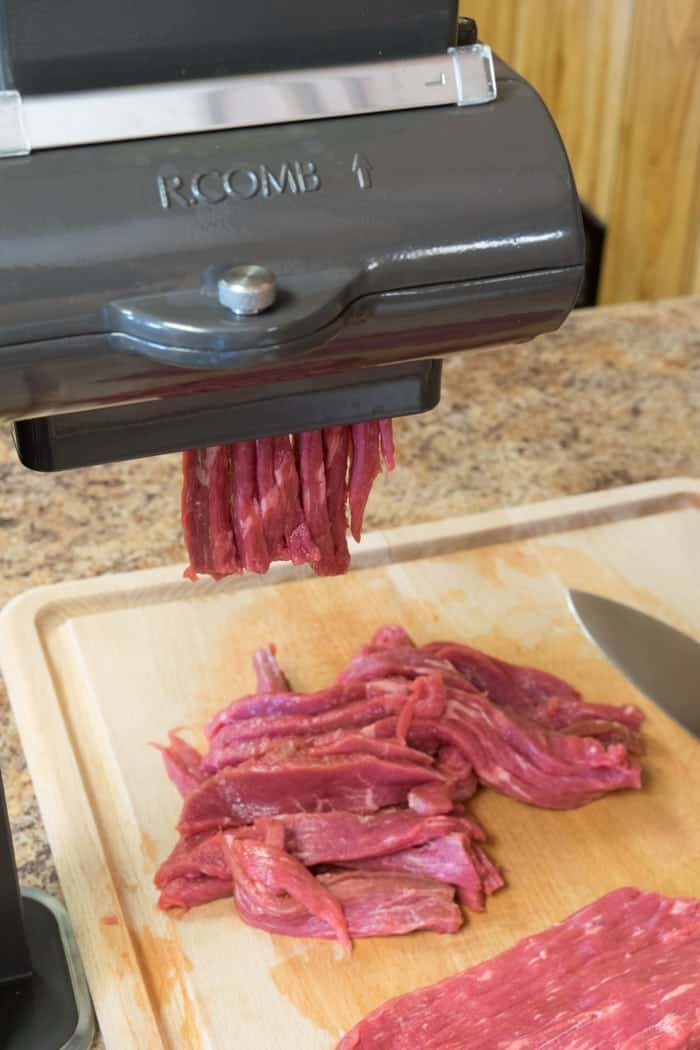
You can also skip the freezing stage and slice your jerky using a jerky slicer. I use a Weston Jerky Slicer. It makes sure all your strips are the same width which allows them to dry evenly. Having a slicer is great when making a lot of jerky.
🧂 Marinating the meat
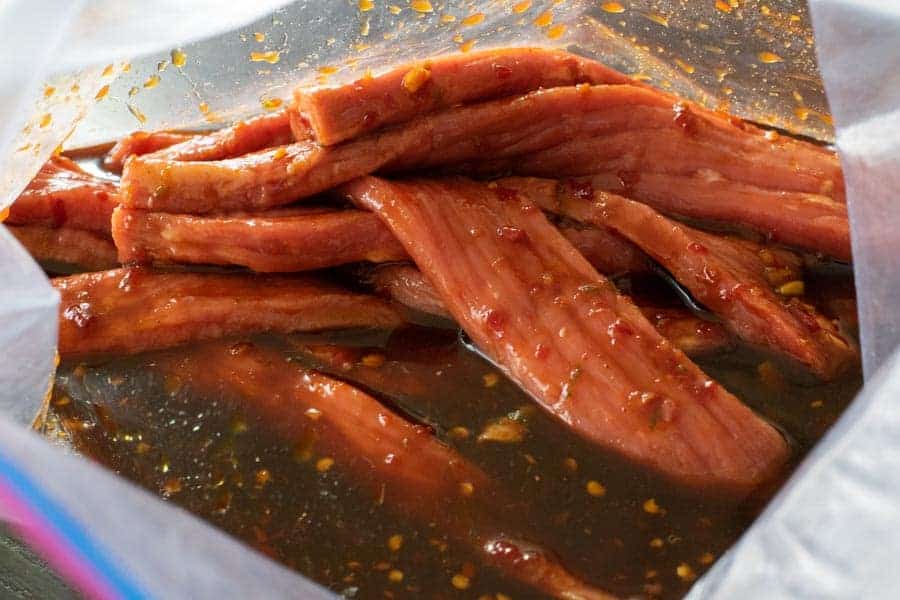
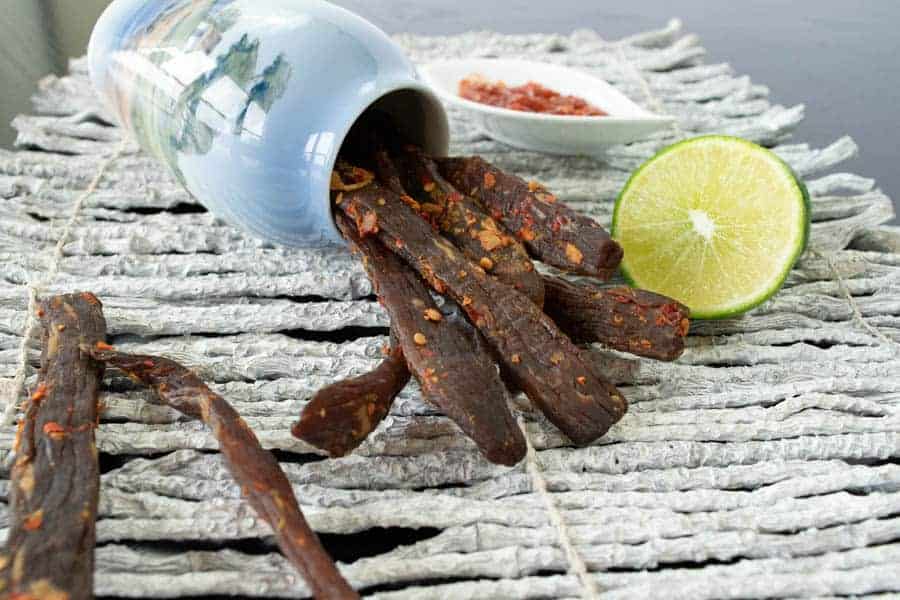
4 - Place the slices of beef to the side and assemble your jerky marinade. As I mentioned earlier, I am using my Chili Lime recipe for this batch, but you can find dozens of jerky marinades on my beef jerky recipe page.
Once you have made your marinade, place the beef slices in your marinade and make sure they are covered evenly. Marinate the jerky in the refrigerator for 6-24 hours.
5 - Cover the bottom rack of the oven with aluminum foil to avoid drippings during the drying process. It will make a mess if you do not put a layer of protection down. If you are like me, the last thing you want to do is spend an hour cleaning your oven because you skipped a 30 second step in the process!
⏲️ Drying the jerky
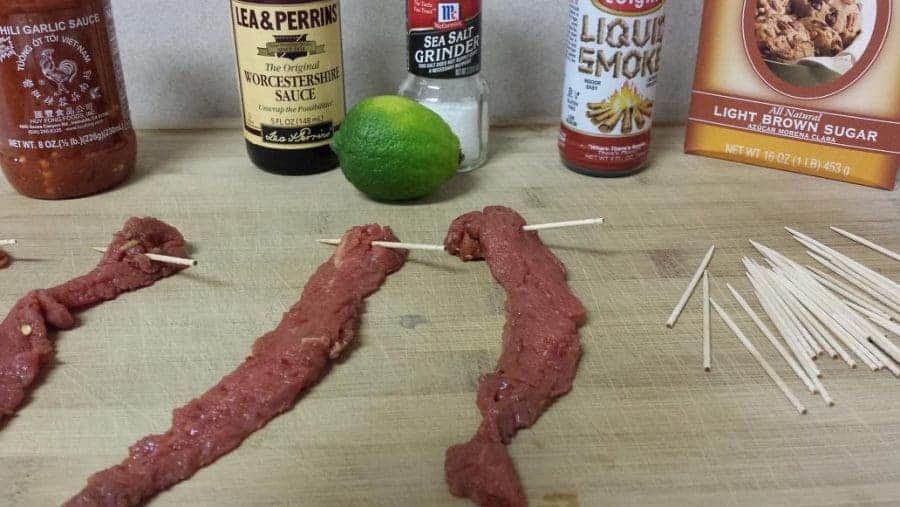
6 - Dry the strips on paper towels to soak up any excess marinade and either lay the jerky pieces across the metal rack or use toothpicks and hang the strips. I have decided to use toothpicks to hang my strips. After drying the strips with paper towels, I slide one toothpick through one of the ends of each piece of jerky.
7 - Take the metal rack out of the oven and pre-heat the oven between 170° to 200°F. Hang the strips on the metal rack while its outside the oven. You can also place the strips laying flat on a baking/cooling rack and leave the ovens metal rack in the oven while pre-heating.
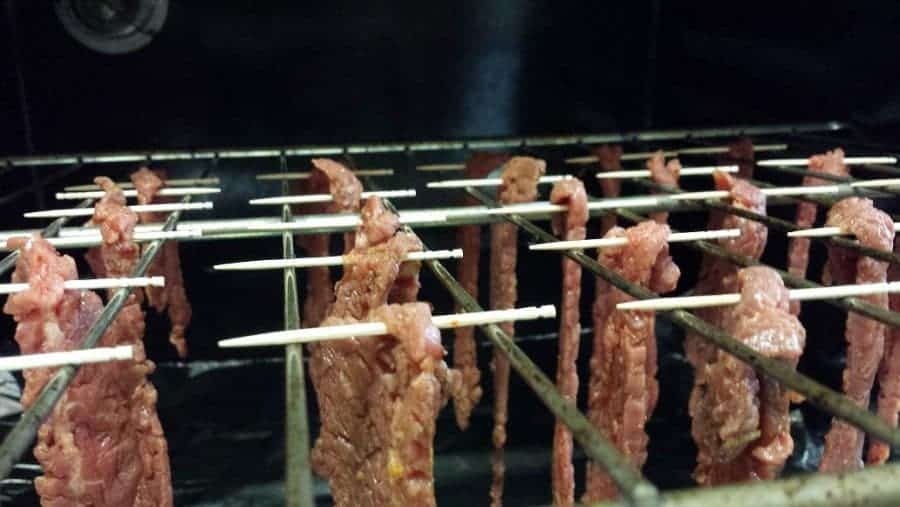
8 - Once pre-heated, put the oven rack of jerky in the oven on the highest rack position, being careful not to allow the strips to fall. When making beef jerky without a dehydrator and in an oven, make sure to prop the door open with a wooden spoon to allow moisture to escape and air to circulate during the drying process.

🌡️ How to determine when it's finished drying
9 - It should take between 3-8 hours to dry in the oven depending on the thickness of the jerky. Check after 3 hours, and continue as needed. The jerky will be done when it bends and cracks but does not break in half. It took 4 hours to dry this jerky to my liking.
10. Allow the jerky to cool for an hour or so to room temperature and then store in air tight containers in the refrigerator or a dark cool place. Learn more about how long jerky stays good and how to store it on my storing beef jerky page.
That's all there is to making great tasting beef jerky in an oven. It's a great way to get started in making jerky without having to buy any fancy and expensive equipment.
Let me know if you have any questions or share your thoughts by leaving a comment below!
💭 FAQ
Yes, ground jerky can be made by extruding jerky from a jerky gun onto a cooling rack, then placed in the oven.
Yes! Still make sure to prop the door open with a spoon to let the moisture escape.
Between 170°F to 200°F is the best temperature to make beef jerky.
👨🏻🍳 Old Pro Tips
- Line any baking pan with aluminum foil to make clean up easier. Then lay the jerky strips on cooling racks on top of the pan.
- Use a wooden spoon to prop the oven door open. This allows moisture to escape and helps dry out the jerky.
- Using liquid smoke will give jerky that is made in an oven that smoky flavor.
Related Posts:

Ingredients
Lean Beef
- 1 lb eye of round
Marinade
- 1 teaspoon mesquite liquid smoke (Don't add if using a smoker)
- 2 tablespoon worcestershire sauce
- 2 tablespoon soy sauce
- 2 tablespoon chili garlic sauce
- ½ teaspoon salt
- 1 tablespoon brown sugar
- 1 ½ tablespoon lime juice
- 1 zest of lime
Optional
- ¼ teaspoon Curing Salt (Prague Powder #1)
Equipment
Instructions
- Pick you favorite type of beef and trim all visible fat. Place the meat in the freezer for 1-2 hours to partially freeze. This allows for easier slicing and more consistent widths.
- Mix all above ingredients in a container with a tight fitting lid. Whisk marinade until all brown sugar is dissolved.
- Remove beef from the freezer and slice against the grain between ⅛"-¼" thick.
- Add sliced beef to the container of marinade and shake well to evenly coat the meat. Marinate in the refrigerator for 6-24 hours.
- After marinating, remove and pat dry the strips with paper towels. Either hang from toothpicks or lay the jerky on a cooling rack and place in a 170°F - 200°F preheated oven.
- Prop the door of the oven open with a wooden spoon and bake the jerky for 3-6 hours. Begin checking for doneness at 3 hours.
- The beef jerky will be finished when it bends and cracks, but does not break in half. Allow to cool for several hours before storing in an air tight container.
Pro Tips
- Trim all fat from the meat before marinating for longer lasting jerky once it’s finished drying
- Use curing salt or celery juice powder to extend the life of the jerky
- Marinate closer to 24 hours for the most intense flavor
- Use fresh Limes for most intense flavor
Nutrition
Bri. says
How long is the jerky good for?
Will says
This will give you everything you need to know.
matt says
Try using Shish Kabob sticks instead of toothpicks. A lot of ergonomic benefits from doing so.
Karlheinz says
Good cheap way to make jerky
Laurie Mc says
Hi.. loved the article. Very helpful for a first time jerky maker. I have a Samsung oven that has a dehydrated mode. Would or should I still use the wooden spoon for release air? Thank you
Laurie
Will says
I’ve never seen one of these ovens so I would recommend reading the manual. You probably won’t need to prop it open. Let me know how it turns out!
Joanne Patton says
I just made my first batch and it turned out excellent. Thanks for posting the recipe.
Danny says
I have read that the meat should be sliced 1/4 inch thick but does it matter how wide or long the pieces are?
Will says
Hey Danny. No, it does NOT matter how wide or long the strips are.
Karen Prentiss says
Hello I do have a question of making jerky. My husband likes it as hot as you can give it. So I'm still trying my question is I sliced my meat very thin and made my strips it's marinating in the refrigerator from last night. But I only did a dry rub do I need to add any liquid to that marinating bag with what if I do what would I use thank you for helping me. Have a great day was fun reading your articles
Will says
You can do a dry rub, you don't have to do a wet rub. I prefer wet rubs because I normally use curing salt and it needs to be dissolved. Water or beef broth are both good liquids to use for marinating.
Gary Coots says
Thanks for all this great info! I am trying my very first batch, using eye of round (44oz. wet) and my Samsung oven set to dehydrate with 165 degree setting. I'm using the Smokey Joe's recipe, which I marinated for 6 hours. I'll let y'all know how it turns out. I love smoked meats using pecan wood and my next batch of jerky I'm going to try using just my outdoor smoker.
Will says
Let me know how it turns out Gary. Using the smoker adds great natural flavor!
Rami Mahfouz says
great articles on this site! couple of days ago I asked my missus to pick me up some ribeyes from the butcher but she picked up some flank steak by accident... so today I'm making jerky! 🙂
Quick question though, I am thinking of only using salt and pepper for marinade due to dietary restrictions.. Would I still need to leave it in the fridge for 24 hours if all I'm putting on it is salt and pepper?
Thanks Tim, Keep being awesome
Rami Mahfouz says
Also, after the initial 10 minutes at 300f we should turn down the oven to the lowest setting.. mine goes down to 122f (50c) is that too low?
Thanks again!
Will says
I try to keep it around 140F as the lowest. 122F would work as well though.
Will says
I might be a little late answering your question but you would not need to marinate it. Just put the salt and pepper on and start dehydrating!
BK says
I just found this site, I've been looking all over for affordable jerky in bulk, and it just doesn't exist. Then it dawned on me, I'll just make it myself! So I'll be giving it a shot, thanks for all the instructions and advice to OP and everyone else – NOW IT'S JERKY MAKIN' TIME!!!
Will says
Glad you found the site, let me know how your jerky turns out!
Rand says
A great meat to use is the 2 big fat-free slabs of breast meat from a Canada goose or other wild goose. Makes excellent jerky from an otherwise tough piece of meat. Your oven recipe will work fine.
Will says
Thanks for the tip. I just need to get a Canadian goose! I have yet to make goose jerky.
Philip R says
This Samsung oven i have stays in the pre heat mode at 175* ... With a temp probe what temp should it the be for it to be safe to eat? right now it's in the oven for an hour and the meat is 114* F any sugg.
Will says
160F internal temperature. If you are going to dry the jerky at 175F, it's going to take around 4 or more hours. You will not be able to use a probe to get the internal temperature if you dry on that low of heat. If you pre-heat the meat to 160F, you need to increase the temperature of your oven to around 300F for around 12 minutes or so.
M. B. says
I've made this about 3x over the last year or so. IT'S AMAZING. Tips for 1st timers:
~Definitely hang meat with toothpicks from rack. Cooks way better than laying on a rack.
~I line the bottom of oven with aluminum foil to prevent a mess.
~ Marinate for 24 hours MINIMUM. I've even done 2 days. The flavor is so much better!
Frances Tussing says
Hi Will,
What a great site! Thanks so much for all this useful information.
I am ready to start making some jerky for my son. Who is in the Marines and goes "out in the field" for a week at a time. Carrying all his food with him. I think this wood be a great option for him. Store bought jerky is so expensive. How long do you think it would last unrefrigerated?
I am planning on using your curing salt. Does it go in the marinade?
Will says
It does go into the marinade. I would also invest in a vacuum sealer to help keep it longer. If you use curing salt and vacuum seal it should last a couple months.
virgile thomas says
Hey There !
Just wanted to thank you for the recipe, tried it this week end and it turned out wonderful ! The beef is just dry enough to be crunchy and the worcestershire sauce i added brings a gentle sweetness to the meat.
Greetings from Paris, France !
Will says
Wow, all the way from Paris! My wife LOVES visiting your city.... Glad the recipe worked out Virgile!
Christian says
Just popped some frying steak in the convection oven Will ...........5 hours later salt and pepper jerky , don't know why I've been buying it for so many years!!!!
Regards from the UK
Chris
Will says
Yep, homemade jerky beats store bought all day long! Cheers!
Katrina Landon says
Using my own recipe, but using your steps. Got in the oven right now! Thank you for posting your steps!
Will says
No problem Katrina. Let me know how it turns out!
Paul says
Hi Will. Just finished making my first ever jerky, using this recipe & a piece of topside. So much better than the mass produced stuff we get in the uk. A bit drier than I was expecting after 3 hours, but I did have problems keeping my oven at a low enough temp.
I'm looking forward to refining things with the next batch.
Will says
Glad to hear it turned out good! Make sure to check out some of my other Recipes as well!
Rhonda says
Hi Will! Great site. I am sharing it with my niece and nephew. They were planning on running out to buy a dehydrator and meat slicer to make jerky. I shared a recipe for using LEAN ground beef and an oven. I love your recipes for flank steak, (we usually use London Broil) and I'm going to start working on some fun, tasty recipes to use with the LEAN ground beef, incorporating some of your ingredient combinations! Thanks for sharing yours!
Will says
No problem Rhonda! Glad you guys are enjoying the site and recipes!
Dawn says
I used skewers instead of tooth picks (less of a balancing act). Can get 24 strips per skewer to fit on oven rack. 2 1 /2 lbs of meat only filled just over a 1/4 of rack space.
Will says
You are totally right Dawn, they do work great!
Michael Cool says
Hello Will,
I just found your site and I plan on trying your oven jerky, but I have a question. I have a fairly large cookie sheet with a removable grate. Do you think that will work?
Will says
As long as the grate allows air to circulate under the jerky, it should work just fine! Let me know how it turns out.
Iris V says
Hi,
I have a question. My oven does not work when opening the door with a wooden spoon. What would you recommend to do?
Will says
Huh. Haven't heard of that before. Is it a convection oven that has a fan inside? If so, you don't need to leave the door open. The fan should circulate the air and vent it as well.
mrs watson says
I have kids who loves jerky is this hot and can you give me a recipes that aint hot and spicey for my kids please ansd is a little tender please
Will says
I have plenty of recipes that do not have heat. You can find them on my recipe page.
Jerry Davison says
My first batch of beef jerky is now in the oven. Now I wait. I looked all over the www for recipes and instructions and yours was the only one I saw that started out hotter and came down in temperature. That made logical sense to me. Thanks for that!
Will says
No problem Jerry. How did your jerky turn out?!
Vuk says
Hey Will, awesome site! One day I just decided that I may as well make my own jerky - it's astronomically expensive here in Norway.
I made my first batch and it was ... ok. I cut it way too thin, like 1/14 in (2mm) - it was really thin. But still tasty. It took very short time though, maybe 1.5 hours.
Now I have a new batch in the oven (convection oven, sitting at around 60C (140F)) and after 1.5 hours it seems... done? It's weird 'cause your site says way longer and all other sites say way longer. I cut it thicker this time, about 5-7mm (1/5~1/3 in) but it's already kinda hard and when I pull it apart it has those "white fibers" and it's not cracking but bending and "breaking at the seams"... So by all your signs it should be done.
I'm just gonna troop it out and hope at least 3 hours will be fine even though I feel like 2 is plenty. Any reason why this is happening? Could it be a convection thing? I see you write it shouldn't dry on less than 145F, but I'm also "afraid" to have it on higher since the convection oven is always about 20-25C "hotter" than the regular oven.
Will says
Thanks Vuk for checking out my site all the way from Norway! I do not have a convection oven, and therefor have not made jerky in one. If your jerky seems finished and you have white fibers after 2 hours, I would call it done. The convection oven might be speeding up the drying process a lot. It really depends on the equipment on how fast the jerky dries. My dehydrators normally take about 4 hours. My smoker takes closer to 7 hours. I have had jerky that I pre-heated only take 3 hours in a dehydrator. If it's done, it's done! I would use a thermometer to see what the actual temperature inside the oven is reaching. Also, you can wrap a thermometer in a thin piece of meat to make sure your jerky is reaching an internal temp of 160F. That way you know exactly how your oven is performing. I noticed you posted this yesterday, how did your jerky turn out? What recipe did you use?
Vuk says
Hi again Will!
I came back a few days after my post but couldn't find it. I just located it again :). I ended up keeping them in a bit longer, another 30-40 mins just to see if I was wrong or not. But it seems my convection oven really does dry it quite fast as they came out a bit "crispy" at that point. Although even the crispy ones end up chewy once you start munching on them 🙂 I've been making the Spicy Sweet Beef Jerky - and I love it! I've also tried the Horseraddish and vinegar one which was OK (my mom loved it though) and I've tried the Spicy Jerky with Frank's RedHot (although no FRH in Norway anymore, so I switched it with Tabasco).
I'm gonna attempt those two again, but this time I'll use some Tabasco Buffalo Style sauce instead of Frank's RedHot, and perhaps a similar one with Chipotle Tabasco - it has a great smoky taste!
I got about 3 batches of 1.3 lb top round all sliced up and I'm about to marinade them in 3 different marinades! Really looking forward to this batch 🙂
Will says
Cool! Looks like you have found a couple good recipes that y'all like. If you have habanero tabasco in Norway, that's a great recipe!
KAY BARLEN says
Will I am trying to increase my protein intake and thought this would be a good way. My only problem there were no recipe amounts for the marinade and since I have never made this before I am little leery as how to proceed. Thanks for any help or suggestions you can give.
Will says
You can check out all my recipes on my recipe page. Pick a recipe you like and it will have all the info you need.
Bradley says
Try using your grill - I made Jerky with flank steak with my son and after much thought, about how to dry I turned on 1 burner on my grill at lowest setting and it maintained a perfect temperature - and, no mess. Give t a shot.
Will says
Thanks for the tip Bradley. I'll have to give that a try!
Glenn says
Important question for those who have used a convection oven. Does the jerky smell linger for very long in the oven - especially the next few times cooking for any food? Wondering if the spouse will not be a fan. Also what would be a good cooking order and split of time to combine a pellet grill smoker and convection oven with dehydrate function for the best jerky to get great smoke flavor but not too much and not burn pellets for 5 or so hours? Maybe 1-2 hours on smoker first then the rest in the oven?
Desiree says
How would I do it if I just want to use salt, maybe a little horseradish?
Will says
You can make a marinade out of anything you want. If you just want salt and horseradish, only use that as your marinade or rub it on the meat before dehydrating.
Stacy says
Awesome site, thank you! I've been itching to try jerky for a few months now, I saw your instructions and well - my jerky is in the oven! I used just a sprinkle of salt on both sides because I'm too impatient- I've pulled out two pieces of my small batch cut into smaller bits, it is exactly what I wanted soooo delicious, I will be trying biltong spices next!!! I can barely contain my excitement!! Lol it's the little things- thank you so much!
Will says
Thanks for the nice words, glad you like the site!
Danielle says
Hi Will, I want to use this recipe but had a question about oven temperature. My lowest setting on my oven is 150*F, it’s a turn dial and is marked per 50*, so I’m hesitant to try and gauge 160* accurately. I’m wondering if 150*F would be too low to make jerky?
Will says
I would put it at 170F for the first 2-3 hours and if you wanted, you could turn it down to 150F after that. You want to make sure the meat reaches an internal temp of 160F, so I would not keep the oven at 150F the entire time since it would never reach the 160F.
Tony says
Hi Will,
All the way from Melbourne, Australia.
Just want to take the time to say thank you for the website, very helpful.
Ive just thrown together my own two recipes in the fridge as we speak of a Smokey bbq and honey soy chilli (this was before I found you)
One question I do have is, measuring ingredients a must or can you do as I did and just put a bit of this and a bit of that?
Keen to put together the chilli lime jerky.
Thanks again will
Will says
They sound like some good recipes Tony! No need to measure, just throw some stuff together and see how it turns out. Thanks for checking me out from all the way on the other side of the world!
Karyn says
I am using wild hog meat to make jerky. I just want to clarify, can it be safely cooked for 10 minutes in a 300 degree oven on cooling racks and then moved to a preheated dehydrator (@ 145 degrees) to finish? (do I need to flip the strips over at all?)
I have tried several different methods and it turns out great, but I am looking for the safest method that will produce optimal results. Thanks for your help.
Will says
That should do the trick. I use an oven thermometer and fold one of the thinnest pieces in two with the thermometer in the middle to make sure it gets to 160F. Then dry it at a minimum of 145F until it is done.
Ian says
This internal temperature topic keeps coming up Will.
People eat rare steaks, why is the jerky different?
PS. got some marinating right now and will be going in my mini convection oven tomorrow.
Will says
Good question Ian. With steak; it comes out of the fridge, sits at room temperature for maybe 30 minutes, is cooked and consumed (even if it doesn't get to 160F). The steak also is normally about 1" thick which helps prevent any bacteria on the outside from reaching the inside and the outside bacteria is killed when cooked. Jerky on the other hand takes several hours to reach 160F in a dehydrator, has been sliced very thin potentially allowing more bacteria on each slice, and then can sit out of the fridge for a week or more. Hope this helps... Let me know how the jerky turns out!
Eric says
Hi Will,
I'm making my first batch right now; flank steak, cut in 1/8 strips, marinated for a day in devils spit bbq/soy/honey/garlic powder/onion powder/black pepper/red pepper flakes/Hungarian hot paprika. Started at 300 for 10 minutes, and it's been in at 175 on convection for 3.5 hours. I think it's almost done. Will let you know the results...thanks for the tips.
Will says
Sound good. Don't forget to let me know how it turns out!
Brian says
Thanks for all the info! I'm trying my first batch in my convection oven as we speak.
Will says
Nice! Let me know how it turns out!
Brian says
I never gave an update... cane out perfect, I have done quite a lot of recipes so far... Your website the best! Thanks again!
Helene says
Can you use pork loin for jerkey?
Will says
Yep! It's actually the best cut to use when making pork jerky. Just trim any visible fat before slicing and marinating.
Vanessa says
Have two batches marinating now, used moose instead of beef. Trying teriyaki & cracked pepper. Love your site
Will says
Thanks! Hope your jerky turns out great!
Cindy Baker says
I love your site. I sent out your "oven-hung" vacuum packed jerky for Christmas this year and folks loved it. I asked the butcher about jerky meat and he showed me the Carne Asada. It's so easy to cut the fat off and with its natural split, I use all the shorter pieces in one recipe and the longer pieces in another! Thanks for making it easy!
Will says
Carne Asada meat is normally a flank steak, a good cut of beef for jerky. Jerky makes a great present as you have found out, glad I could help Cindy!
Brad says
Is using the racks crucial or can the meat be layed flat on an oven tray?
Will says
The racks allow the air to flow underneath the jerky. It would not work that great if you laid them right on an oven tray. Either hang the jerky with toothpicks or buy cooling racks to play on top of a tray to lay them out.
Karen says
I have read that using a meat tenderizer tool is helpful in making beef jerky more tender (so less expensive cuts of meat can be used). I noticed that there are hammer type meat tenderizer tools as well as those that have needles that puncture the meat to allow better absorption of the marinade. Do you recommend either of these?
Will says
I normally use a meat mallet and hit the meat with the pyramid shaped side. This also helps keep my cuts an even thickness for drying. If I don't use my Jerky Slicer, I sometimes get different width slices. A meat mallet can help keep them consistent which makes drying times the same for all the strips.
Paul says
Hi, just tried your technique for the first time tonight, although I didn’t have enough tooth picks so some are hanging, some are laying down. Korean bbq for the flavor and in a convection oven at 170 as we speak. Thanks for the tops!
Will says
No problem Paul. Hope it turned out tasty.
Garry Roberts says
I've been making Jerky for a few years now. I like the spicy side so tend to add chilli with smoked paprika and always brown sugar for a sweet kick.
Cut them thin and don't over dry them is my advice. I prefer a bit of chew and not crunch.
Just cooking up a batch now mmm it has been a while.
Thanks for the site and the advice it all looks
Garry from the other side of the pond UK
Will says
No problem Garry. Thanks for visiting from the UK! I love seeing people from all over the world checking out my site!
Laurie Z says
I haven’t seen any mention of curing. I make my jerky from prepackaged spices and cure packets added to ground beef. If the meat is cooked at the magical 160 degrees for at least ten minutes does that remove the need for cure?
Will says
I do use cure on about half of my recipes. It is not needed if you heat the jerky to 160F, but will help it last longer. It does not need to be at 160F for 10 minutes, just getting it there is good enough. Check out my page on Jerky Safety.
Yvan Charbonneau says
Hello Will !
Happy new year !!!
I'm from Montreal, Canada, i made the jalapeno jerky,with all the seeds and
no '' fire '' but my concern is that it took 1hour and 30minutes to cook ?????
a batch is in the oven now ,so we will see.....
Yvan
Will says
Happy New year Yvan! 1:30 hrs seems extremely fast for jerky to finish. I have never had jerky take that quick. If it wasn't spicy enough, throw in a couple more jalapenos. The problem I find with jalapenos is throughout the year they vary in spice greatly! Sometimes I get jalapenos from the same supermarket that aren't spicy at all, and other times they are super spicy! It's a good idea to taste the marinade before hand to get an idea of how spicy the recipe is going to turn out.
DryHumour says
Awesome! Jerky here in the UK is ridiculously expensive for what you get. Have a batch in the oven right now (fan oven so assisted drying) at 60°C. Tried a taster and it was great.
I’m noticing some residue on the outside even though I’d say it’s done, I think it could be congealed marinade that’s leeched from inside. Giving it another hour to see.
Ended up making a lemon-soy sauce marinade with pepper, red peppers, bahamat, paprika and a touch of HP sauce.
Will says
Depending on the marinade or the cut of beef you use you might have liquid or fat come to the surface. You can just pat dry the strips while dehydrating to get rid of the extra moisture. If you try to keep drying until it's gone, you might over dry the meat. Sounds like a good recipe!
Diane Hyslop says
Meant to say Fiordland way down in New Zealand 🙂
Will says
At first I thought you were talking about Iceland, but don’t remember seeing any deer there on my last trip. I hope to visit New Zealand soon!
Diane Hyslop says
Hi Will, my son and I have just put our first batch of venison jerky in the oven. (A stag my husband shot during the Roar in Fiordland this earlier this year) We were surprised how much liquid came out of the meat in that first 10 minutes. Looking forward to the end result :-). Will let you know.
Will says
Wow, that’s awesome! Let me know...
R. K. Delka says
I've been searching the net for jerky info but have not found so much quality information consolidated all in one spot until this site. Great job! My first batch is in the oven right now.
Will says
Thanks! Let me know how it turns out!
Sheila says
Hi, I have a kitchen aid oven with a bread proof setting of 100F. Is that too low? Otherwise, I can do 170F as that's the next lowest setting. Thanks!
Will says
It is not recommended to dry meat at any time during the drying process lower than 145F. 170F is a good setting.
Sheila says
Duly noted! Makes me wonder why the AB process with just that fan is ok. Went with your big rig recipe. Can't wait to taste it!
Justin s says
I've just put my kangaroo in the oven following this recipe..
This is my first try at making jerky.
The liquid smoke is a game changer.
Wish me luck.
Will says
Kangaroo?! Hell yeah! Good Luck! Let me know how it turns out...
Stephanie says
Just found your site while looking for jerky recipes for Christmas. It’ll be my first try but you’ve done a great job explaining the basics, especially with the oven. I’m excited to get started! Thanks!
Will says
I'm glad the site has helped explain how to make jerky. Let me know how yours turns out!
Darryl says
I tried just coating with a good dry rub and not
Marinating it came out great, have you tried this method before?
Will says
Yep. I have a recipe on here called Steak Dry Rub Jerky. It tasted pretty good!
savage says
Does it last like bagged beef jerky does or will it go bad relatively quickly?
Will says
It will NOT last as long as commercial jerky in a sealed container. Check out my page on storing jerky for more information.
Carl says
I am going to use the kitchen oven to make the chili lime beef jerky. I noticed in the drying instructions that you hang the meat at 160 degrees, or 170 degrees for 3 to 8 hours. However, I read somewhere in the other instructions that you should preheat the meat at 300 degrees for approximately 10 minutes, before doing the drying process (to kill any bacteria)......But I didn't see this (300 degree/10 minutes) in the chili lime beef jerky recipe. So, do I need to do the 300 degree/10 minutes in the beginning, or not ?? Thank you for your help.
Will says
I would recommend pre-heating it for 10 minutes at 300F to kill any bacteria. I will fix that. Thanks for the heads up!
Mike says
I have my beef marinating. Can't wait to dry it.
Marinade is: liquid bovril, liquid smoke, sea salt , pepper, garlic, smoked paprika, Worcestershire sauce, red hot, CPL dabs of tobasco.
Will says
Sounds good! I have never heard of Bovril before. I might have to order some and give it a try...
SteveK says
First time making in a convection oven. We had trimmings from a fillet roast and I couldn't bear not to use them somehow. Very fatty, but I actually like that. Didn't know about the shorter shelf life for marbled meat. Won't matter, as I plan to eat it quickly!
Will says
Yep, doesn't matter if you eat it fast! Ha.
Willy Summers says
Awesome site! Thanks for sharing your love of jerky. I was about ready to pull the trigger on an expensive food dehydrator... but will be trying your oven method soon!
Will says
That's the right idea Willy. Might as well go the inexpensive way first to see if you like making homemade beef jerky. You probably will though, and will be buying a dehydrator soon. Haha.
Barry Trudell says
Hi Will...This will be my first time making jerky and I have learned a great deal from your site. I have sliced sirloin tip steak (that's all I had) against the grain into 1/4 inch thick pieces. Half are soaking overnight in fridge in marinade of 1cup hickory barbecue sauce and 2 cups water. The other half soaking in 1cup chilli garlic sauce and 2 cups water. I plan on hanging the meat on kabob skewers on the rack in my oven with the door cracked open a little. My oven only goes as low as 170 degrees so I will check after 3 hours for doneness but will go longer if needed. Will the jerky be safe to eat drying at this temperature? I only plan on drying Saturday evening so I hope you can answer me before I start. Thanks in advance.
Will says
Sorry Barry for not getting back to you in time. I do recommend a pre-heat of the jerky to get the internal temperature to 160F before drying. It is an extra step that makes sure to kill any potential bacteria. Many people do not do this step and are fine eating their jerky, I recommend it though. Check out my page on making safe jerky.
Barry Trudell says
Thanks for the answer Will. I did my jerky in the oven without the pre-heat. Took 3hours & 40 minutes and I removed and let air dry for 3 hours. After that I put jerky in mason jars in a cool dark cupboard. Both flavors came out 100% and neither lasted very long although I only used a couple pounds of steak for my first try. (and no one got sick without the pre-heat) Jerky tasted much better after a day in the jars. Soaking my second try tonight...got about 6 pounds of sirloin tip soaking in the chilli garlic sauce and will dry Tuesday evening. Going to a hockey tournament on the weekend...so there will be at least one jar going with me so I can pass it around to the partying adults while the girl's hockey team rests for the next game...LOL
Rebecca says
Im trying this now and so far so good. Ive got what i call Original whic i put some salt, pepper, onion powder, garlic powder and water in a glad bag. I had the juice of one lime and added 2/3 of sweet chilli sauce in another. Ive also got Teriyaki and Hoisen flavours. Fingers crossed they turn out well andso far so good
Will says
Let me know how they turn out!
Steve says
Just got a moose here in NH and look forward to trying to make jerky in my gas oven. Thank you for the great tips and instructions.
Will says
No problem Steve!
Gavin says
Hi Will,
I have just started making jerky and found your site! Thanks for all the great recipes and work you put into it! I have been air drying my jerky with a fan over night! Does doing it in the oven make it taste different? I don't like a very dry jerky so that is why I went with the air drying up till now! Thanks in advance!
Will says
It shouldn't make it taste any different. I would recommend reading my safe jerky post. It's not a good idea to make jerky without heating it to an internal temperature of 160F. Definitely try the oven method, it is safer and will taste great!
Martin says
My gas oven won't go below 300°F. That is the lowest setting 1. Should I just shorten the drying time?
Will says
It's going to be quite hard with an oven that doesn't go real low. Definitely keep the oven door open to allow the heat to escape and like you mentioned, start checking the jerky to see if it is finished after about an hour. I've never tried to dry jerky at that temperature with the door open, so I am not sure how long it will take. Just start checking it early.
Cheryl says
Hi, I'm new at this, but instead of the oven wire racks, I'm using bakers wire cooling racks on top of foil covered cookie sheets. I have to make smaller batches but its working great. Can't wait to try some of your recipes
Will says
You are right Cheryl, using the cooling rack works great too. Let me know when you find a recipe you really like!
n says
i want to try this, but my oven is such that i can't leave the door propped open (it will beep at me incessantly and i can't handle that for 3 hours!)...is it going to be a problem if i keep the oven door closed? will it change the baking time or will it change the end product greatly?? thanks...
Will says
It will change the product by not allowing the moisture to escape the oven. Unless you have a convection oven that sucks the air out, then it will probably end up alright. Otherwise, I would recommend buying an inexpensive dehydrator.
Mac McAtee says
n, Try opening the oven door once an hour for a couple of minutes. That should let moisture that builds up in there out.
The longer the jerky drys the less moisture in the oven. Try opening every thirty minutes for three cycles and then once an hour till done as well.
John says
On my oven there's a little button the door depresses when it's closed. I just taped that down, no more beeping.
geoy says
check your oven door to see if you can find the switch and try to figure how to keep the switch closed with something that won't melt or burn and still have the door propped open slightly. if you have a gas oven and are concerned with possible fumes leaving the exhaust fan on and having fresh air feeding close to kitchen area by upening a door or window will be safe
John D says
I just made a batch using Claudes Fajita marinade.....going on oven tomorrow....
Marc says
Just found this website. I am getting super excited about making some jerky now! I will be using my oven when I finally get to making some and will let you know how it turns out! Thanks for all of the wonderful information. Keep it all coming! Marc
Will says
Appreciate the kind words man! Welcome to the world of jerky making...
Nancy says
So glad you have this site. Beef jerky is so expensive. I am going to try some of your recipes. What type of beef would you recommend to use?
Will says
Glad you are getting into jerky making Nancy! Check out my page on The Best Cuts of Beef for Jerky.
Sensei says
Top sirloin makes the best, deer is a close second. If you want your jerky to have some bite add two shots of whiskey to marinade, if you want a smooth jerky add half a beer
Simon says
Very interesting! I'm guessing the Whiskey would be a great taste!
Brian Hogan says
Will .i am from Australia. What is liquid fire, please.
Will says
Hey Brian! Liquid smoke is a liquid that can be added to your marinade which will make the jerky have a smokey flavor as if it was dried in a smoker. There are many different flavors, here is a link to a hickory and mesquite flavored liquid smoke on amazon. These are pretty common here in the States, I am not sure about Australia... but you might find it in your local grocery store. Cheers!
Mike G says
Dont get Liquid Smoke on you're hands . . . they will smell 2 days . . . but, it is used in everything from cooking to mixed liquer drinks ?
Devon says
You can buy liquid smoke at Bunnings
Pam Kermeen says
I have my meat cut in strips and marinating. Can the marinade be frozen to re-use or should it be tossed?
This is my first batch. I am not much on measuring so I just threw in some soy sauce, Worcester sauce, steak sauce and a blend of spices with a small amount of liquid fire. Going to dry after work tomorrow.
Will says
I do not recommend freezing or reusing a marinade once you have already soaked your meat in it. It is just not recommended from a safety stand point. Discard your marinade and start fresh the next batch. Marinades tend to be pretty inexpensive anyway. Let me know how you first batch turns out!
Nick says
Cold is called a “bacteriostatic”. In other words, refrigerating only slows down bacteria growth. Freezing slows it down even more (almost stopped) but doesn’t kill anything. So every time you dip some meat in your marinade, you add new bacteria which stay in it and keep multiplicating. After reusing it a couple times, it may become pretty dangerous 😉
Dan says
I've reused marinade that I've soaked shrimp in. Just have to bring it to a boil for a bit to kill off any bacteria. But yes, marinade is pretty inexpensive.
Jim says
Will where did you get the big tooth pick you hang the meat from
Will says
They might look big, but they are regular sized toothpicks. Here is a link of the type I have. I bought them at my local grocery store and you should be able to find them locally as well. They are just a little more heavy duty that the really cheap ones.
Will Too says
I use bamboo skewers for ka-bobs, they also work great and you can place more than one piece of meat on a stick.
Trevor says
Use the wooden shish-ka-Bob sticks. They don't dall between the racks and I find it easier to thread 10 strips at once and hang.
Stephen Brown says
Thanks for the oven recipe. Tried it and afraid I didn't marinate the meat long enough
used Eye of Round and meat is bland tasting. Any ideas to spice it up or is it too late?
Will says
Unfortunately there isn't much you can do after the jerky has dried. I am surprised it didn't have much flavor. How long did you marinate it for?
scott says
Now that it is dry you can re-hydrate with more marinade and dry again. If at first you don't succeed, dry, dry again!
Jennifer van Aerle says
Hello Will .
I live in Holland Europe, and I'm gone give this a try. We love Beef Jerky but its not easy to get hear in The Netherlands. Thanks for the recepy.
Jennifer.
Will says
Awesome! I love hearing from people all over the world. Let me know how it turns out. Thanks for stopping by Jennifer!
RB says
The oven method is great. Popping some in this afternoon. Also freeze it for future beach snacks. Experiment with marinades and make it anything you like. Thanks for sharing your tips.
Will says
No problem, Thanks for stopping by!
Bonnie says
Do you have a recipe without liquid smoke?
Will says
There are several recipes on here that do not have liquid smoke. But don't be afraid to alter any of the recipes you find on the site. If you do not like liquid smoke, just omit it from the ingredients. It of course will change the taste a little, but most recipes will still taste great.
Eric Rich says
I am not new to jerky making, but I found you because I was looking for a recipe that did not include Worcestershire sauce. To me, Worcestershire sauce overrides everything else. I have just begun a marinade in your sriracha recipe. 2.30 pounds of bottom round in a zip lock. I will probably marinate 30 hours due to my schedule. I use the oven at 170. I have never tried it with the door propped open. I will do that this time.
Lonnie says
I found your site while looking for a recipe to make steak style jerky. I will be trying some of your recipes while I continue looking for the steak style. I may just try cooking them a lot less time.
John Paul Morris says
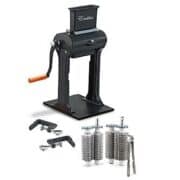
If you go the ground beef route the LEM gun is the only way to go. Been using one for more than 10 years and it still works good as new. Drove 90 miles to the Bass Pro Shop in Shreveport to buy one and it was well worth the trip. I use the oven, dehydrator, and smoker, but the oven always turns out the best Jeremy. I squeeze out 12" strips from the gun and lay them across a grill rack on top of an aluminum backing tray.
Will says
The LEM Jerky Cannon is very well built. That's why I bought one as well. When looking to buy a jerky gun, there are several on the market. Most have a lot of plastic and have reviews of them breaking after several uses. The LEM Cannon though has lasted me several years and is still going strong. Thanks for the comment John!
Amanda says
I'm using ground deer. How long does it take for jerky in oven?
Will says
It really just depends on how thick your slices are and the oven. I would start checking it around 4 hours to see if it is done.
Andree says
Hi, I just found your site, very nice! I wanted to know if the marinade is necessary. I'd like to make “meat flavored” jerky, is that possible? Thanks.
Will says
You can keep the marinade to a minimum if you are looking for that "meat flavor". I have never made jerky without ANY flavor, not sure how great that would taste. I would add at least some salt and pepper to the meat before drying.
Jasper says
Salt and Pepper is actually all the use for Biltong in South Africa. It should get a great flavour. Another great thing I tried is some fresh Lavender. It compliments the lemon zest very well 😉
Will says
Never thought about lavender, I'll have to give that a try. Thanks!
Hayden says
Lavender makes your place good
Evelyn says
I make jerky for my dog and skip all flavors. It tastes AMAZING!
Will says
I'm sure the dog loves it!
Matt F says
I just found your site and have my first batch in the oven. However, I am worried about the fat in my strips. I purchased a Flank Steak and while I was cutting it I found fat running in the middle. There is a lot of marbling and I am worried if this could ruin the jerky.
Will says
Cutting out the fat allows the jerky to have a longer shelf life because fat spoils quicker. It's okay if it has some fat, just eat it within a couple of days. Also, keeping it in the fridge will help it last longer as well. It should still taste fantastic!
Heather says
Eating it right out of the freezer is great too!
Mike says
Hi Will, Going to try the oven method, just wondering if using the convection option would be too fast or would it help
dry more consistently, would I still have to vent the oven? Thanks Mike.
Will says
Hey Mike! I have personally never used a convection oven when making beef jerky but think that it would be a great option. Convection ovens move air around inside the oven as well as vent the air out for a dryer atmosphere inside the oven. You would not have to keep the door open when using a convection oven and your jerky would more than likely dry a little faster. So make sure to check on it a little sooner than you would in a regular oven. Let me know how it works!
Bre says
Hey Guys,
I haven't made jerky yet but am ready to try it. I do have a convection oven and it has a "drying" setting specifically designed for dehydrating. I use it for drying herbs, vegtables, and making granola. So for folks with convection ovens, I suggest that they review their oven's instruction manual. It may have a drying setting also.
Will says
Cool. Thanks for the heads up!
Andi says
I always use my convection oven. It works like a charm. Definitely dries out faster. Remember that when cooking convection, it's like baking at 25° higher temp because of the air circulation. I often still keep my oven door propped open to allow heat to escape.
Will says
I wish I had a convection oven... Thanks for the tip on the temperature!
Hayden says
Yes you are right
SWG says
The "convection oven" feature on my oven, called "Quick Bake", does allow an oven oven temperature lower than 325 degrees F.
Kara says
Where do you get the chili garlic sauce?
Will says
Hey Kara! I buy chili garlic sauce at my local grocery store in the Asian section. It is very common, so I am pretty sure your local store will carry it. If not, you can order it on amazon here.
Kenny says
What is the maximum thickness can one go on jerky strips? Thank you
Will says
I wouldn't go any more than 1/2". I don't like going over 1/4". It just starts getting very done on the outside but not on the inside. Once you go bigger than that, you really need to start slow cold smoking it.
Cornholio says
Sriracha
ayden says
Mmmm siracha sauce is always good❤❤❤❤❤❤❤❤