
This post may contain affiliate links. Please read my privacy policy.
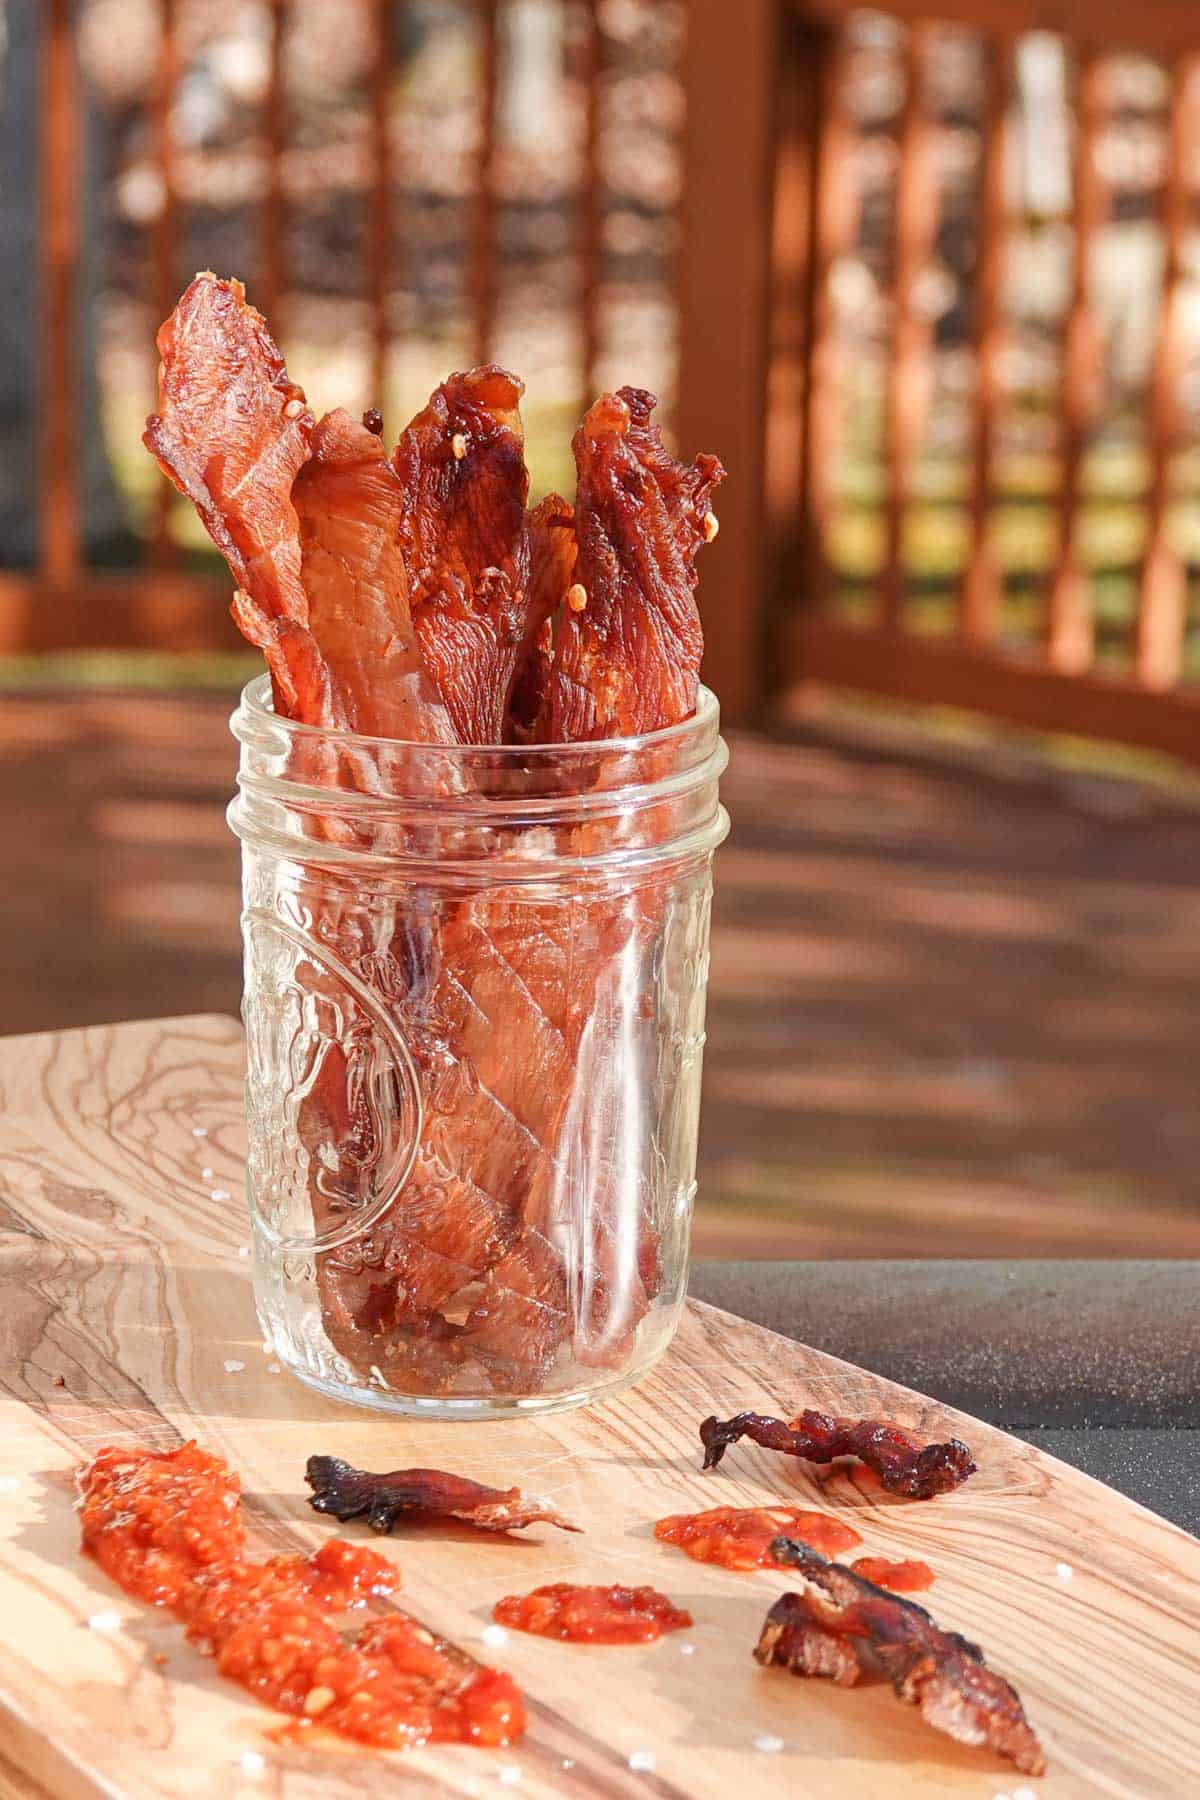
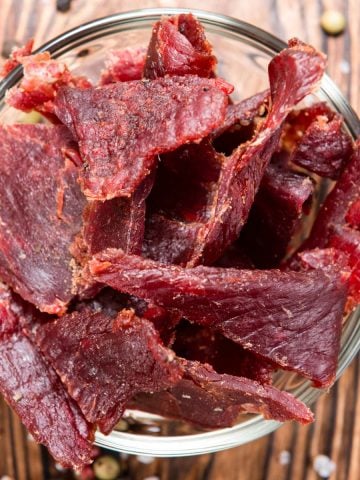
You hear about beef jerky and turkey jerky, but what about chicken jerky?! It tastes AMAZING, but is not as commonly found or made as its counterparts. Let's change that, this protein packed super food is just what you need in your life.
Jump to:
Video - Homemade Chicken Jerky
Why this recipe works
This is a classic flavor that works perfectly with the lean chicken breast. The sweetness of the honey and the spice from the chili garlic sauce are what really make this chicken jerky recipe to die for.
What part of the chicken is best?
Chicken breast is the best part of the chicken to use when making chicken jerky. The breast is the largest part of the bird and very lean. Chicken breast is very inexpensive compared to other types of meat and easily sliced into strips as well.
How to slice the meat
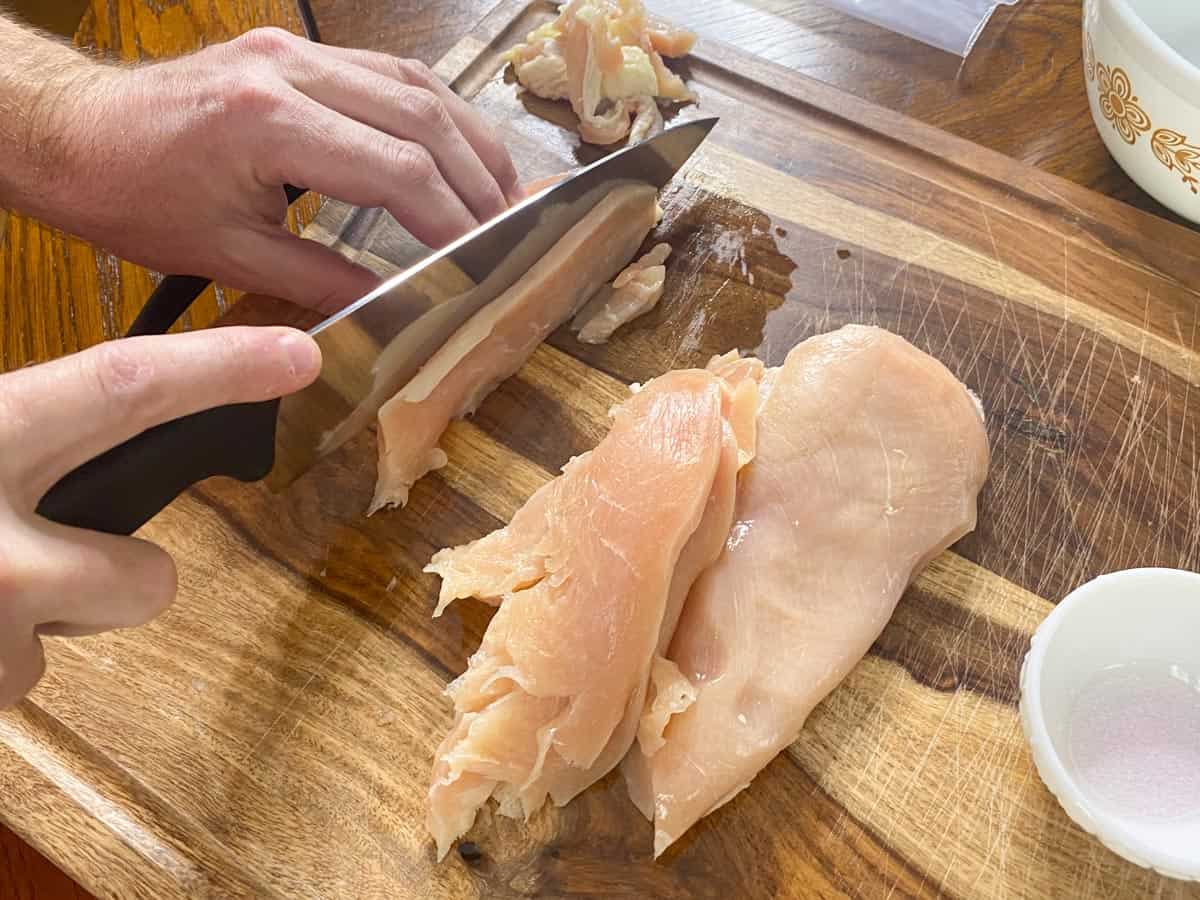
Slice the breasts lengthwise into ⅛" - ¼" strips for the best results. Any larger than that and the outside of the jerky will get very dry whereas the inside will still be under dried. After slicing, place the chicken in a gallon ziplock bag.
Partially freezing the chicken
The first thing you want to do before even slicing is wrap the breasts in plastic wrap and place in the freezer for about an hour. This will firm up the meat and make slicing even strips a lot easier. Slicing even strips is important because this ensures all the jerky will finish drying at the same time.
Using a sharp knife
The most important tool to have when slicing the breast for chicken jerky is a really sharp knife. This will make a huge difference, I am currently using a Victorinox knife that has a really good feel and sharp blade. When it starts getting dull, a quick sharpen and it is just like new.
If you have never sharpened a knife before, it's super easy and will make a HUGE difference when slicing nice even strips of chicken. The people at Cook's Illustrated put together a great article on how to sharpen a knife, it's a must read.
Marinating the chicken
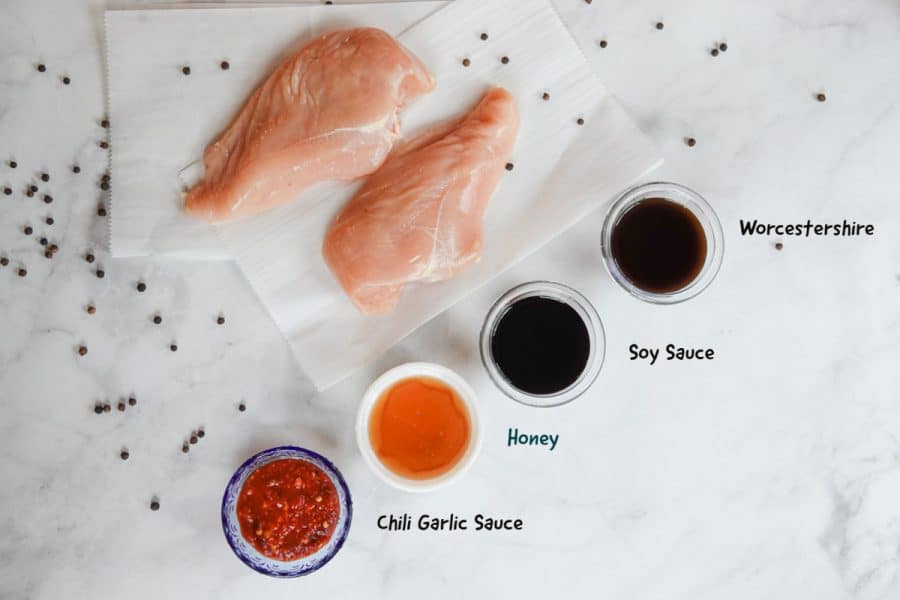
Time to bust out all those great tasting spices and sauces and make the most incredible tasting chicken jerky recipe there is. Let's get started!!!
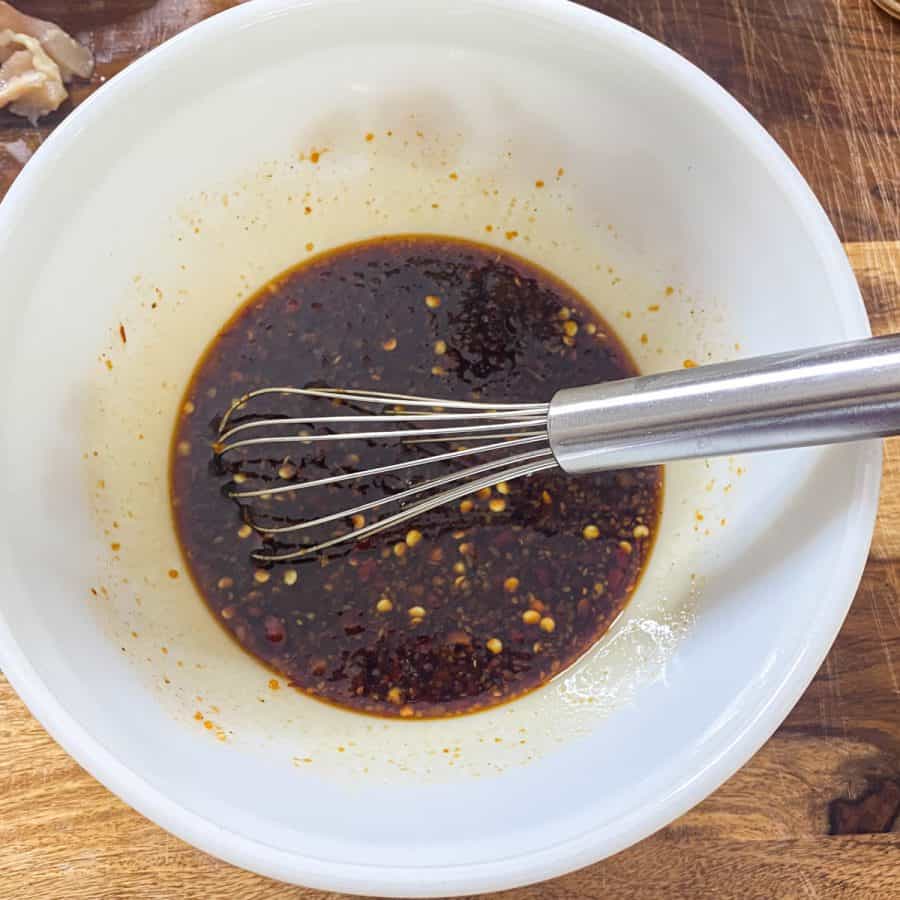
Combine all the ingredients in a bowl and mix well. Pour the marinade over the chicken strips in the gallon ziplock and marinade in the fridge for 6-24 hours. Make sure to shake the bag to make sure all the strips are fully covered by marinade several times while marinating.
Using curing salt
When making chicken or turkey jerky, I always include curing salt into the marinade to help prevent bacteria in the jerky. Curing salt is mostly table salt with about 6% sodium nitrite, an ingredient that removes water from the meat and the bacteria cells themselves.
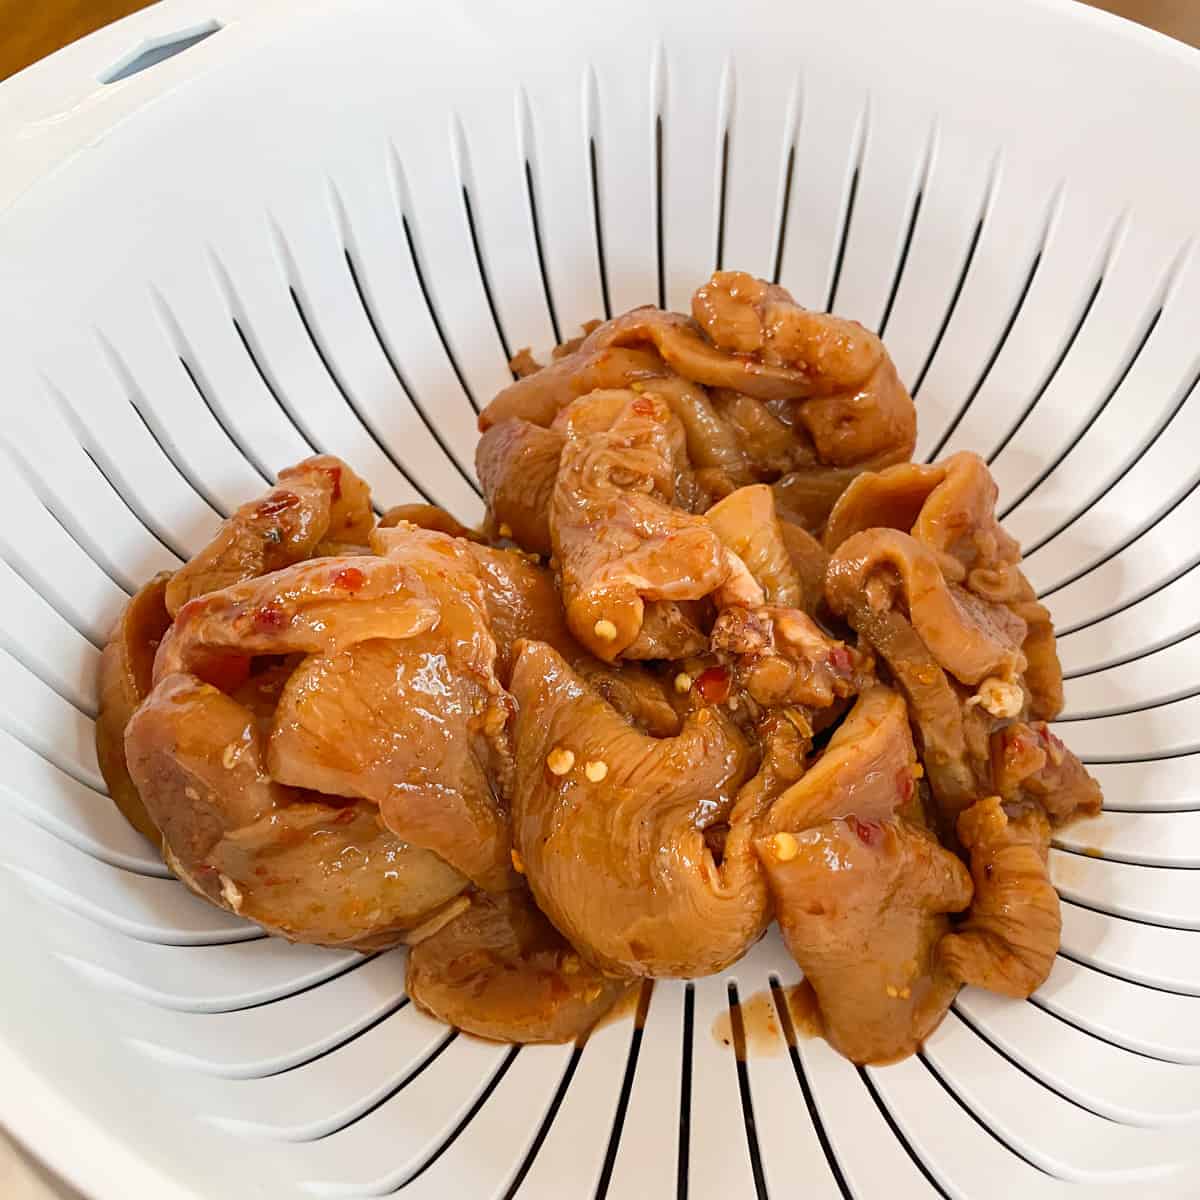
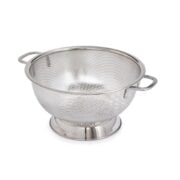
Once the chicken is finished marinating, strain in a colander to remove any excess marinade. You can also pat dry with paper towels to remove even more excess marinade. This will speed up the drying process.
Dehydrating the jerky
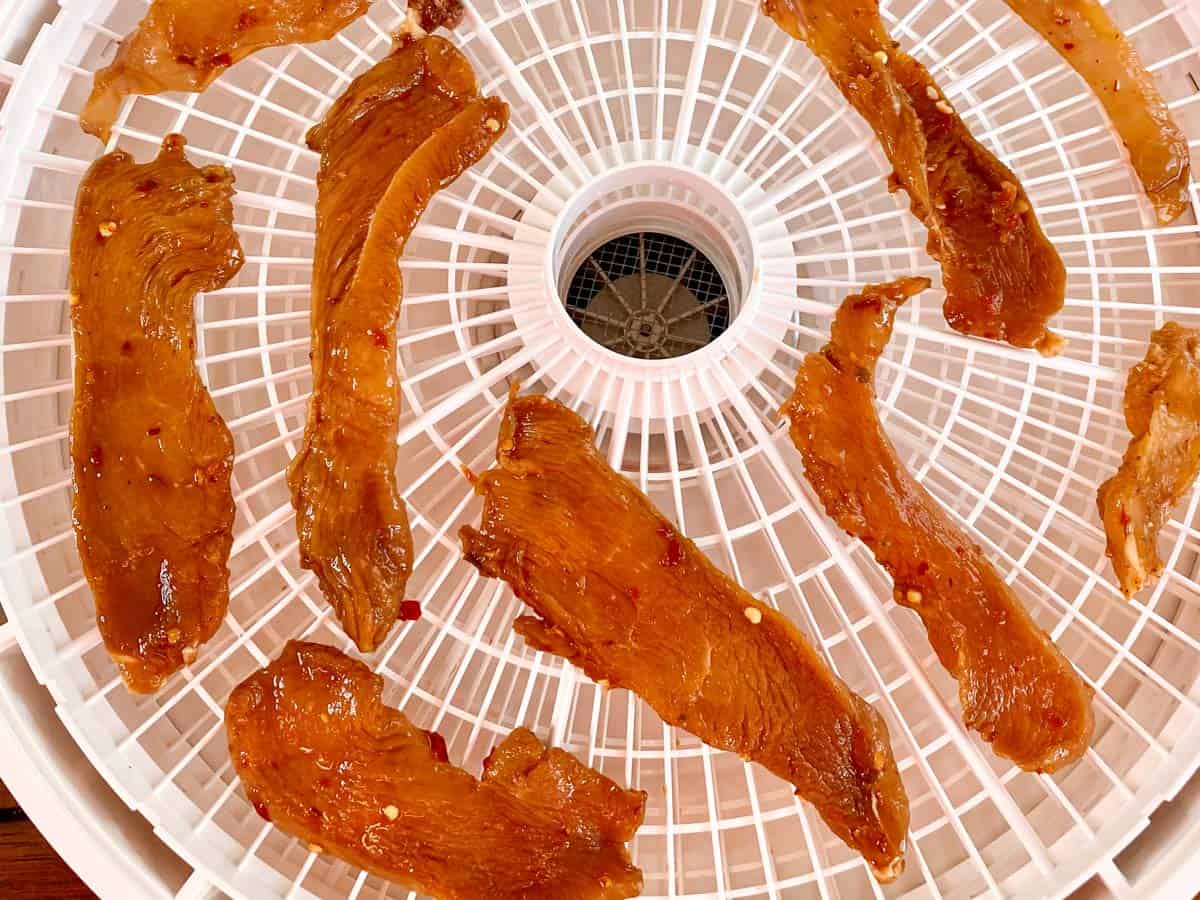
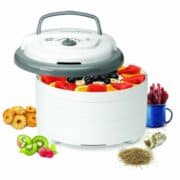
This chicken jerky can be dried by using either a dehydrator, oven, or in a smoker. I decided to make this chicken jerky recipe with a Nesco Dehydrator. Which ever method you are using, arrange the chicken strips on the trays or baking sheet lines with cooling racks.
Make sure the chicken strips aren't touching or overlapping and have enough space in between to allow air to easily flow. This will help speed up the drying process as well.
Dehydrate on the highest setting, normally 165°F, in a dehydrator or at 200°F in a smoker or oven. The jerky should take around 4-6 hours to fully dry.
Pre or post heat treatment
If you are not sure if your dehydrator heats the jerky to this temperature, you can pre-heat the meat or do a post heat treatment to make sure the jerky reaches the all important 165°F. This is done by placing the meat on a cookie sheet and putting in a 300°F pre-heated oven for about 10 minutes. This can be done before dehydrating or after.
Food safety is very important when making jerky, especially chicken or turkey jerky. Here I have put together a lot of great information on jerky safety and food safety steps you can follow when making homemade turkey jerky.
How to tell when it's finished dehydrating
Start checking the chicken jerky about 4 hours into dehydrating to see if it's finished. Remove 1 piece of jerky from the dehydrator, oven, or smoker and allow it to cool to room temperature for 5 minutes.
Once it's cool, perform the bend or rip test to see if it's ready to eat!
The bend test
Bend the jerky in half from end to end in a U shape. The jerky should bend and crack, but not break in half. If it bends into a U shape without cracking, it is not finished and needs to be dried further. Continue drying for another hour or so and check again.
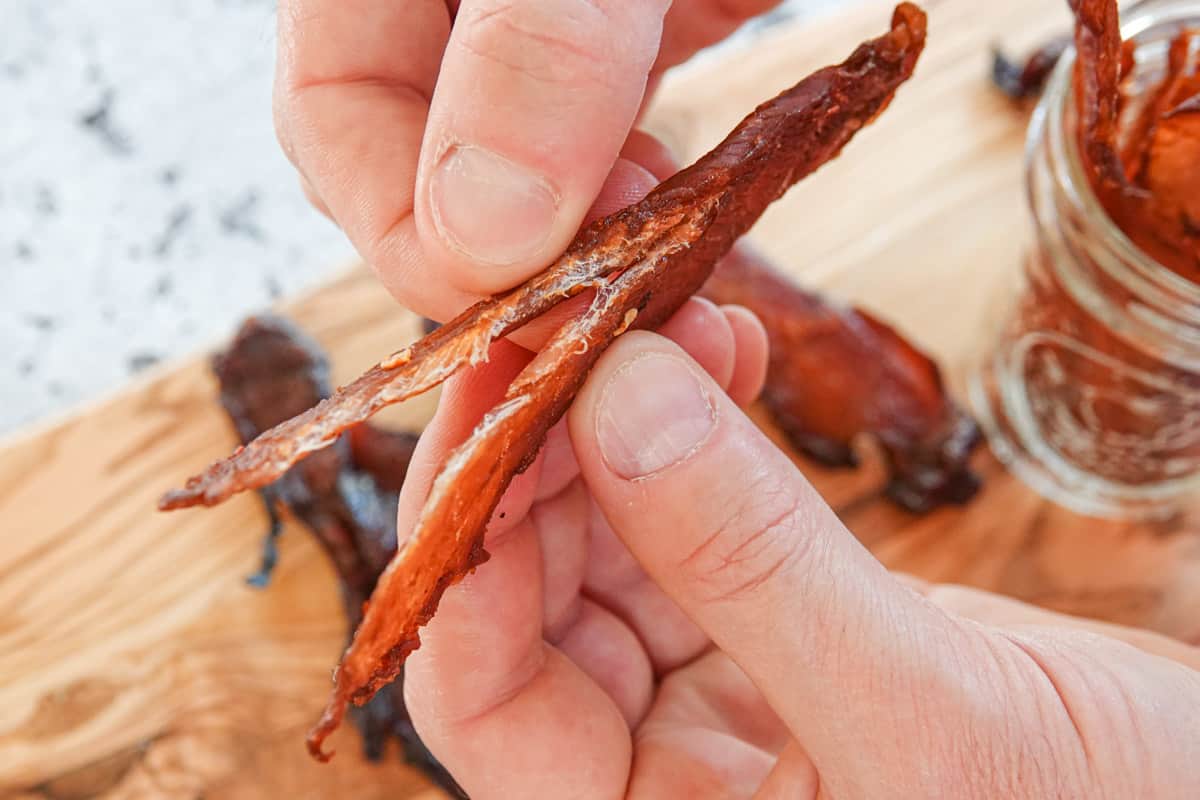
The rip test
Take a piece of chicken jerky and rip it in half by grabbing one end of the jerky and tearing like you would a piece of paper. The jerky should rip in half and white fibers will be easily seen. The white fibers are an indication it is finished drying. If you don't see the fibers and only raw looking meat, it needs to dry longer.
FAQ
Yes! As long as you make sure it reaches an internal temperature of 165°F when drying it will be safe.
I recommend using curing salt when making turkey or chicken jerky. It's another step to make sure the chicken jerky is safe.
I have found that 4-6 hours is common when drying. Doing a pre heat treatment could shorten the drying time.
Old pro tips
- Using hickory or applewood liquid smoke gives a great flavor to the jerky when not dehydrating with a smoker
- Support local bee keepers and bee colonies by buying local honey
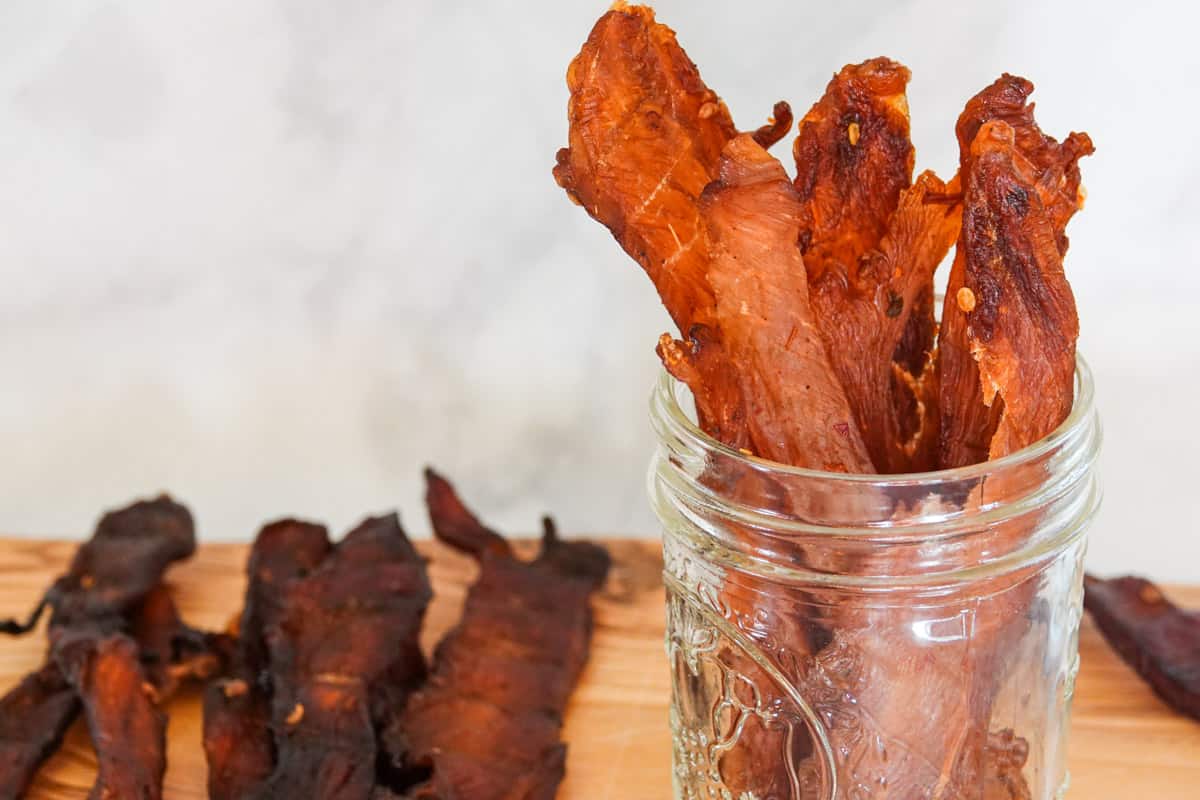
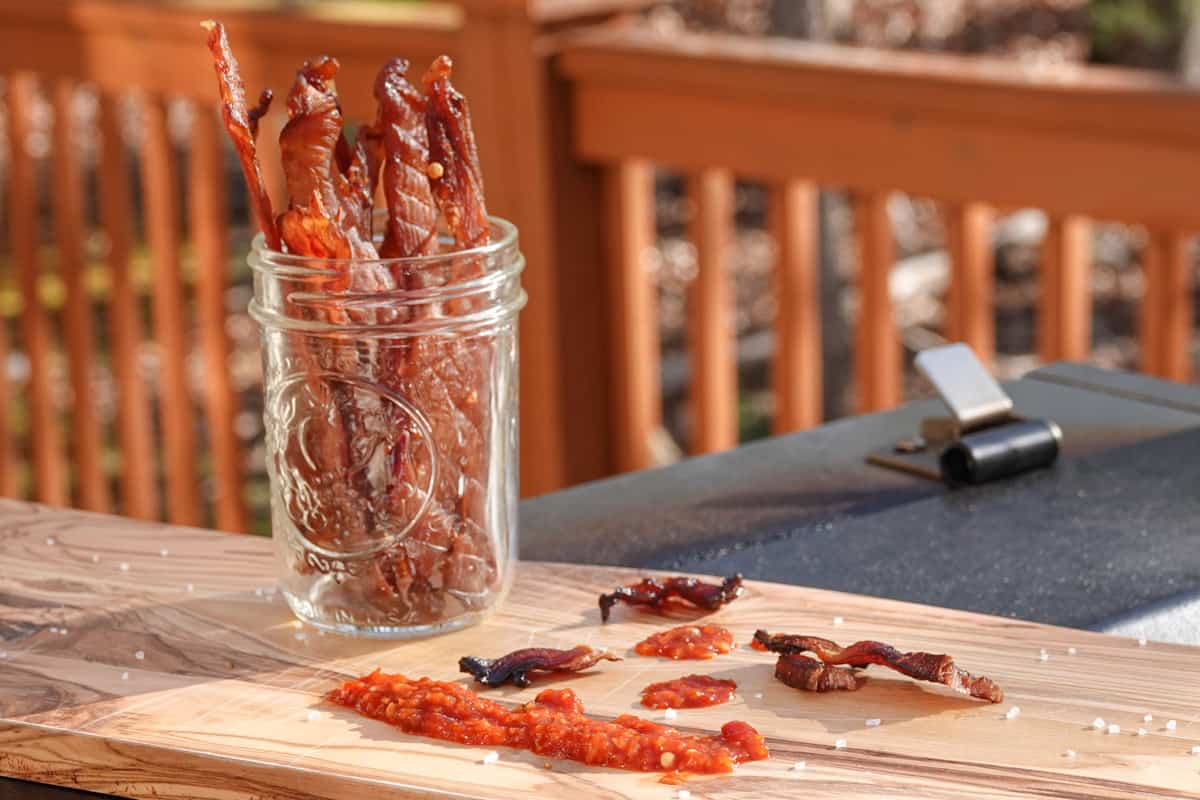
- Store jerky in airtight containers in a cool area out of sunlight. Keep in the refrigerator for best results. Here I have more information on how to store your recently made chicken jerky.
Other jerky recipes you might like


Ingredients
Lean Turkey Breast
- 1 lb Chicken Breast
Marinade
- ⅓ cup soy sauce
- ⅓ cup worcestershire sauce
- ¼ cup honey
- 2 tablespoon chili garlic sauce
- 1 tablespoon liquid smoke (optional (hickory))
- ¼ teaspoon curing salt (optional)
Equipment

Instructions
- Combine all of the ingredients in a bowl and mix well. Pour into ziplock bag.
- Trim all visible fat from the chicken breast and slice into ¼" strips.
- Add sliced chicken breast to the marinade in the ziplock bag and marinate for 6-24 hours in the refrigerator.
- After the meat has finished marinating, remove from refrigerator and strain excess marinade in a colander.
- Lay the strips on the dehydrator trays leaving space between the meat for air to circulate. Make sure the strips are not touching.
- Dehydrate for 4-6 hours. Start checking the jerky if it's finished around the 3.5hr mark.
- The jerky is finished when it bends and cracks, but does not break in half.
Pre or Post Heat Treatment
- If you are unsure if your dehydrator will heat the strips to an internal temperature of 165°F, heat them in the oven either before or after dehydrating at 300°F for 10 minutes.
Video
Pro Tips
- Using hickory or applewood liquid smoke gives a great flavor to the jerky when not dehydrating with a smoker
- Support local bee keepers and bee colonies by buying local honey
- Store jerky in airtight containers in a cool area out of sunlight. Keep in the refrigerator for best results. Here I have more information on how to store your recently made chicken jerky.


Tom W.
I don't eat beef and turkey is too expensive, so I tried this recipe. I have made it many times and it has become my go to recipe, it's hands down the best chicken jerky I've made.
Will
Glad you like it Tom. Thanks for stopping back by and letting me know!
Jordyn
Is serving size supposed to be 1oz? 1g would be loosely the weight of a paper clip
Will
No, it should not be 1g. Not sure what the nutrition calculator was doing. I have changed it. Thank you for pointing this out Jordyn!
Steve
"They want me to fight a chicken!?"
"CHICKEN JERKY!?"
Vantonini
Followed the recipe, and was trying to achieve a spicier flavor so I added a chipotle seasoning, but the Worcestershire was more prominent. I’ve had a dehydrator for many years and never used it, this was a 1st time, so I will tweak the marinade and try again
Gramps
I had my chicken jerky finished and sitting in the dehydrator to cool before vac sealing it and putting it in the fridge.
Got a lot going on and left it in the dehydrator over night by accident.
Is it okay to have done this by accident or should I throw it away or run it again for another run or ??????
Don't want to make anyone sick. But you get old and you get forgetful.
Gramps
Will
So as long as you heated it to 165°F while dehydrating and finished drying the jerky, it should be fine to eat. It's dried just like beef jerky and I have left those in a dehydrator overnight many times. Sometimes you just forget...
Kris
Could the chili sauce be left out for those not wanting a spicy marinade?
Will
Yes. It will still have a great flavor, just not the spice.
cherry
can someone tell me a substitute for worcestershire sauce?
Jody
We used 1/4 tsp., curing salt. We used our oven in Dehydrating mode 170 degrees, with an air fry rack, after 5 hrs the bend test on the jerky had the white areas. We then went to bake 300 degrees for 10 minutes. BURNT to a crisp. so disappointing.
We would like to try again, but do have a concern about safety.
Family members have alpha gal, mammal meat allergy, so poultry and fish are what we need to use.
Thank you for any insight you can give.
Rob
Maybe you can try the pre heat treatment instead of the post heat treatment? Have you tried that?
Tim
If you dehydrate at 170, your chicken would have reached the 165 internal temp so the post bake at 300 is not necessary.
Owen
I’m not sure you need the 300 degree step. If you look at pasteurization charts for sous vide, you actually don’t need to get the chicken to 165 at all. I would think this logic works the same for jerky? I’m no expert in the jerky field though.
Will
Due to the low water content from the dehydrating and the slow rise in temperature, bacteria can become heat resistant and survive at higher temperatures. So pre-heating the meat or making sure your dehydrator can get the chicken to 165°F fairly quickly (helps to slice the chicken very thin) will prevent bacteria growth.
Patti
Do you have a recommendation for an alternate chili garlic sauce? The link in your article to the chili garlic sauce says it's no longer available. Also, how hot and spicy is this particular sauce?
Can't wait to try this!
Thanks,
Patti
Will
I find it pretty spicy. I guarantee that you will find that chili garlic sauce in the Asian section of your local grocery store. If not, any chili garlic sauce that you can see the crushed red pepper in (not a smooth sauce, but more chunky) will work well. Let me know how it turns out Patti!
The_Old_Time_Canner
I have been canning for years, and still do. It has always been my understanding that curing salt is used for meats that are going to spend time curing. Maybe hams, sausages, for example, that are going to cure for a few months - or even a few weeks. I don't really think there is enough risk in only 6 hours to treat it much differently than the beef Jerky. I think, as long as its below the liquid marinade then place in the dehydrator the risk is extremely low. If it taste odd ( a test piece of plain chicken) then I know I'll need the curing salt. But I know a lot of ppl who can chicken raw pack and only use canning salt like they normally do - no nitrates to cloud the brine.
Will
There are two different types of curing salt (prague Powder #1 & #2). PP#2 is used for meats that are going to be cured for a long time, such as hams. PP#1 is used for wet marinades in meat that is going to be cured for short periods of time, such as jerky and sausage. Can you make chicken jerky without curing salt, yes. However, using curing salt helps prevent bacteria growth and makes the jerky safer. I recommend using curing salt when making chicken or beef jerky.
Dustin
Curing salt is mainly for preservation not just for curing before cooking/dehydrating. It is used in jerky’s mainly to help allow for longer shelf life. Unlike regular meats (even cured hams) jerky can and is good for long periods of times after being made.
Scott
Hi Will,
Thanks a lot for the recipe, steps, and tips. I actually tried an experiment where I marinated the chicken overnight and then cooked it in a sous vide bath to be sure it was fully cooked before dehydrating.
The problem was that the purge from the chicken in the sous vide bath really diluted the marinade, so it just tasted like plain chicken. Im thinking about cooking it first and then marinating, but then again, your advice here seems pretty solid.
I was wondering if you'd ever played around with sous vide prior to dehydrating for any meats and if there were any benefits. Thanks!
Will
I haven’t tried it before. But I definitely think it’s worth a try. It might work great!
JanP
I'm taking your advice about putting the chicken in the over for 10 min. But I am curious about the texture of jerky made from fully cooked meat such as the sous vide. Wouldn't that make it texturally different? Is it still chewy like jerky should be? I've made chicken jerky in the past and never knew to pre heat it. I guess I've been lucky! Thanks!
Will
Unfortunately the pre heating will change the consistency of the jerky. If your dehydrator heats to above 165°, it's not needed. If you bake it too long, it can turn out brittle.
Lilly
Do i use curing salt #1 or # 2 for the chicken jerky?
Also, can I smoke it directly on the smoker? If so, do I leave the smoke flavoring out? Thank you!
Will
#1 cure for smoked jerky. You can leave the smoke flavor out when using a smoker.
Traci
I don't have a dehydrator. Do you have suggested time/temp for dehydrating in the oven?
Will
Check out my page on making beef jerky in an oven. It will be the same for chicken jerky.
warren walker
fantastic stocking stuffers!!
Joe
Made exactly. Super good!
Jon Baugh
How would you store chicken jerky and what is the shelf life? If can’t wait to try this recipe on my smoker!
Will
Store chicken jerky the same way you store beef jerky. It's best to use curing salt when making the jerky and then storing in a cool dark place out of sunlight. Freeze pack to get the most air out of the package, this will help the longest when it comes to shelf life. Check out my page on storing jerky.
Belinda
This is so delicious I actually prefer it to beef jerky! A huge thanks from Australia. 🙂
Darryl
Hello Will loved your post on Chicken Jerky. However I like to find a recipe for dog friendly Chicken Jerky. I read that dogs are only allowed certain herbs and no spices. What would you suggest? Honey is fine for dogs. Instead of using curing salts in the marinade is it possible to replace with apple cider vinegar.
Will
I would definitely not use curing salts when making jerky for a dog. Apple cider vinegar should be fine to use with most dogs. I do have a post on making dog beef jerky that mentions some other spices that are dog friendly.
JanP
Darryl, I realize that your post was a year ago, but I would make the jerky, or basically dried chicken, without any spices or additives if I am giving it to my dogs.
Claire
Looks like a great recipe but please don’t cut or put any raw meat on a wood butcher block or cut it up on wood. There is an incredible amount of bacteria in meat. Best to use a totally solid cutting board (i.e. plastic)and wash it carefully with lots of soap and water.
Michelle
Can I use ground chicken breast instead of strips, some family members can’t chew regular jerky? If yes would I instead of marinating simply add a reduced amount of the marinade to the ground chicken and mix it in? Many thanks for your help with this.
Will
Yes you can, but make sure to preheat in an oven before drying. When making ground jerky, especially chicken, it’s important to kill any potential bacteria in the meat. Try to use no more than 1/2 cup of liquid per 1lb of meat. So cut back any liquid ingredients and simply omit any water that is included in a jerky recipe.
Jennifer
Hi Will, do I have to use a sweetner at all or can I omit and have the Kerky come out with the same quality results?
Thanks in advance
Will
You can leave out the honey and it will still turn out tasting great. It just won't have that sweetness you would get with the honey. Feel free to experiment with the recipes!
Jeanie
Can I do both beef and chicken jerky at the same.time?
Will
I do. I just make sure my beef strips are on a tray on my dehydrator that’s above the chicken. That way no juice/marinade from the chicken jerky falls on the beef.
Taira
I made this yesterday. Marinated the chicken overnight, and this turned out absolutely perfect! I can't stop eating it.
Wayne Simmons
Have you tried chicken thighs instead of breast for making jerky??
Will
I have not. I always use chicken breast because of the low fat content. You can totally use thighs, but make sure you trim them well.
Nejla smith
Can you use the Seasoning packets from beef jerky that comes in a box with curing salt and seasoning I would like to try that chicken with mango habanero seasoning and curing salt
Will
Yes. Those seasoning packets will work with any type of meat.
Shirley Kissell
Thank you for the recipe! I used your marinating but took an alternative route. My grandson wanted some chicken jerkey from the rooster of theirs. The rooster as mostly feathers with a small body. He was over a year old which means he will be tuff. I slow cooked the rooster so I would get the meat off the bone. I marinated 24 hours. I dried it in the oven at 250 degrees for 1 hour along with making chocolate popcorn for Christmas. Have a Merry Christmas!
Will
Wow. Sounds like it's going to turn out great. Along with that chocolate popcorn! I am a sucker for chocolate...
Mina
This looks great how do you store the jerky I'm keen to store it for up to 6 weeks on our camping trip. I have a vacuum sealer but not sure if I should freeze?
Will
Hey Mina! Check out my page on storing jerky, it should answer all your questions.
Pam Greer
I love turkey jerky, can't wait to try chicken!
Kay
My partner loves beef jerky, will be trying this chicken version next weekend.
jeffrey palmer
am confused
I see chicken and turkey as meats - but they can be different
which is it - its a great alternative considering you got to break the bank to do beef round roast
Will
Sorry about that Jeffrey. I just finished typing up a turkey jerky before this chicken jerky recipe and apparently still had turkey on the brain. I went through the post and corrected the misprints. Thanks for pointing it out!
jeffrey palmer
Its all good - this weekend my nesco will be filled with chicken as per your recipe.
Like mine a bit hotter but all good and thanks for the reply:)
Jeff
Ava D
Just today it occurred to me to make chicken and/or turkey jerky! I’ve made a lot of beef jerky but I wanted an alternative to spendy beef. Thank you for these instructions, I’ll be trying it in the oven immediately:) I’m even gonna try pork jerky too. Question: how low should I set my oven? I believe 170 is as low as it goes.
Will
Chicken and turkey should be heated to an internal temperature of 165°. So setting it to 170-185 degrees will work great!