
This post may contain affiliate links. Please read my privacy policy.
This is the Beef Jerky recipe that I started passing around while out on the drilling rig in South Texas. This was a bad decision as now many of the guys out here always ask if I have any Jerky on me while we are working. Making homemade jerky results in a big increase in popularity among work colleagues and family members! n

*This recipe is updated with more photos and video of the jerky making process and finished jerky. Original Post: 2/19/2015*
I’m dedicating this recipe to the guys working on the rig; "Rig Hands". Enjoy Rig Hand Jerky! Here is a picture of a drilling rig in South Texas for ya!
Jump to:
Jerky Video
Slicing the meat
Start with a great cut of beef when making this jerky. I used Beef Eye of Round, but you can find a complete list of the best cuts of meat for beef jerky here.
The first step of slicing meat for jerky is to trim the cut of meat of all visible fat. You can see the white fat in the picture below, just trim that off BEFORE you start slicing the meat. Fat spoils faster than meat, so the more you get off now, the longer your jerky will be shelf stable.

Slice the meat with a very sharp knife either with the grain for a more chewy jerky or against the grain for a more tender jerky.
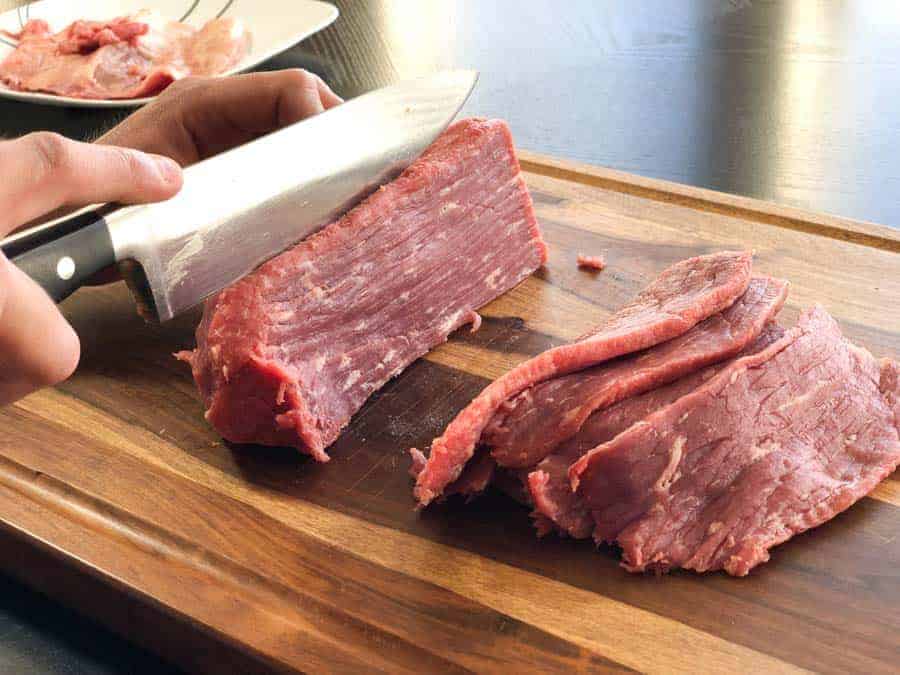
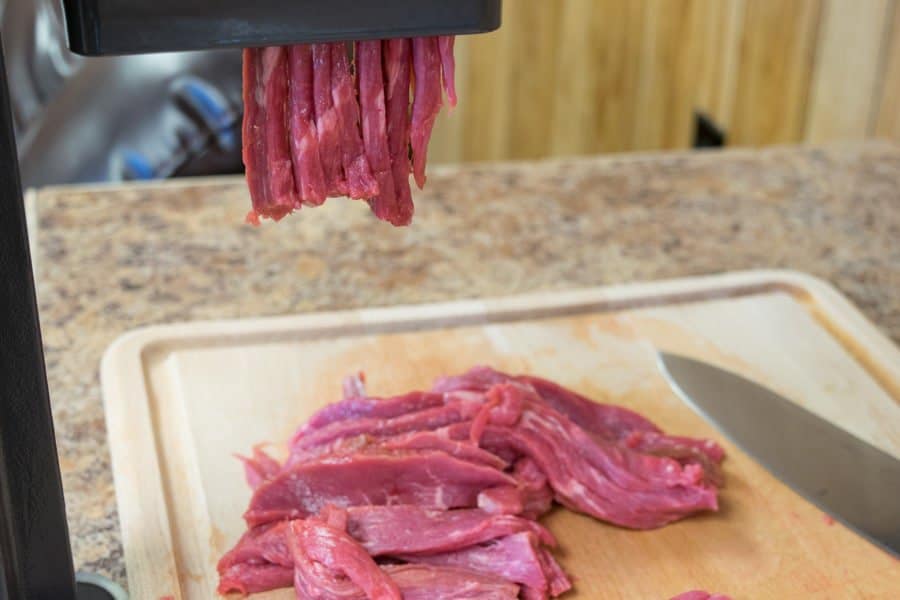
Slice even strips so they will dry evenly and be finished at the same time. You can wrap the roast in plastic wrap and partially freeze for 1-2 hours to make slicing easier.
I didn’t use it on this recipe, but a jerky slicer is a FANTASTIC piece of equipment to help get even strips when slicing jerky.
Making the marinade
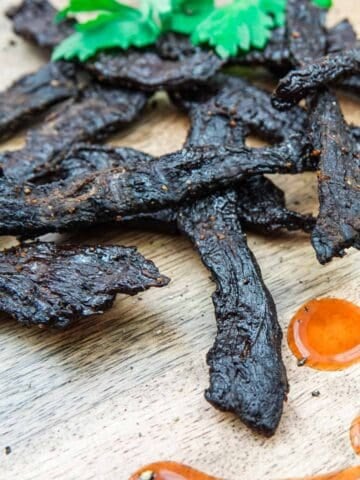
This recipe tastes fantastic because of some of the great tasting ingredients such as soy sauce, worcestershire sauce, brown sugar, and red pepper flakes for a little bit of a spice!
Combine all the ingredients in a bowl or ziplock bag and mix well. Since this recipe does not have any whole peppers, blending in a blender is not needed.
Related Page: Dozens of Great Tasting Jerky Recipes – Click Here
Add the earlier sliced meat strips to the marinade and mix around so all the strips are evenly covered. Allow the strips to marinate for 6-24 hours in the refrigerator. Do NOT marinate the meat at room temperature, always marinate in the fridge to prevent the meat from spoiling.
Dehydrating
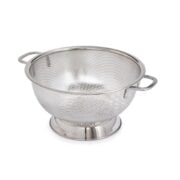
Once the meat has finished marinating, strain any excess marinade in a colander. I marinated this beef for a total of 20 hours before straining. The longer the marinade process, the more intense flavor the jerky will have!
Before adding the meat to your dehydrator, oven, or smoker; lay out paper towels placing the meat strips on top. Pat dry the strips to remove even more of the excess marinade. This step will help speed up the drying process and prevent the meat from being 'sticky' after it has finished drying.
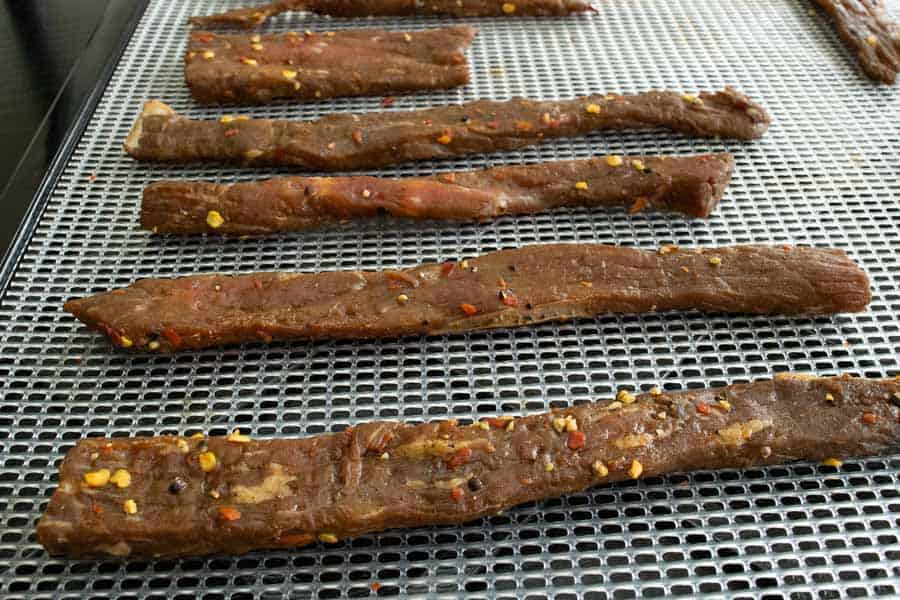
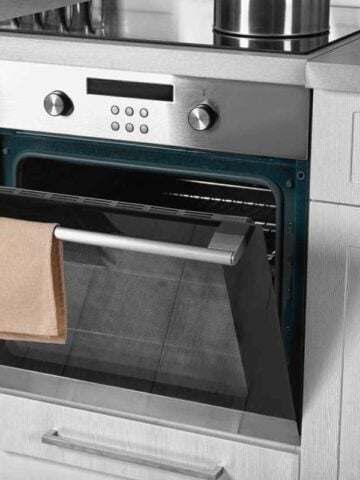
I dried them in my Excalibur Dehydrator for a total of 3 hours at 165°F and 1 hour at 145°F. Make sure the meat reaches an internal temperature of 160°F to kill any potential bacteria. The 3 hours at 165°F in the dehydrator does the trick. You can also pre-heat the meat in an oven before drying if your dehydrator does not heat up to 160°F. Check out my page on jerky safety for more information on this process.
Related Page: Dehydrator Reviews
Testing for when it's finished
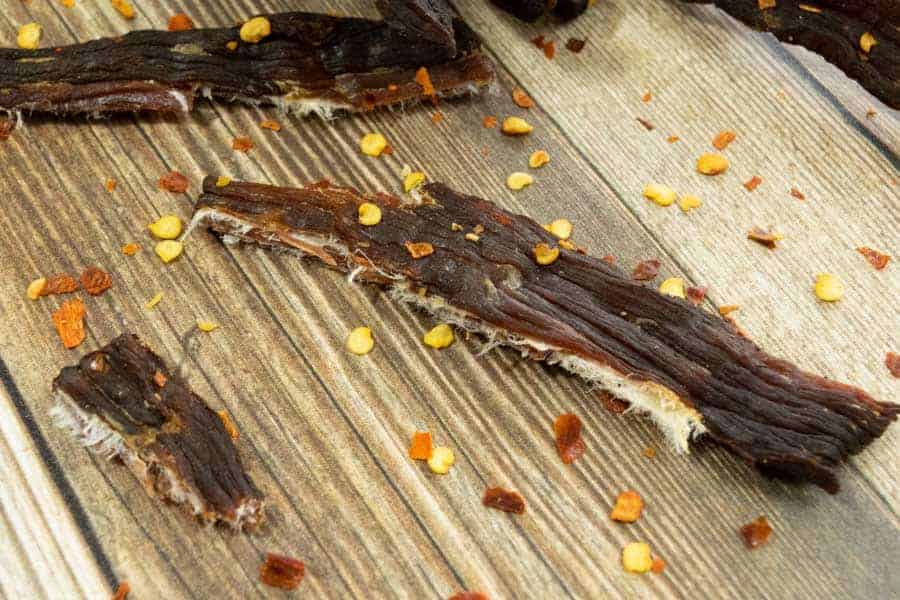
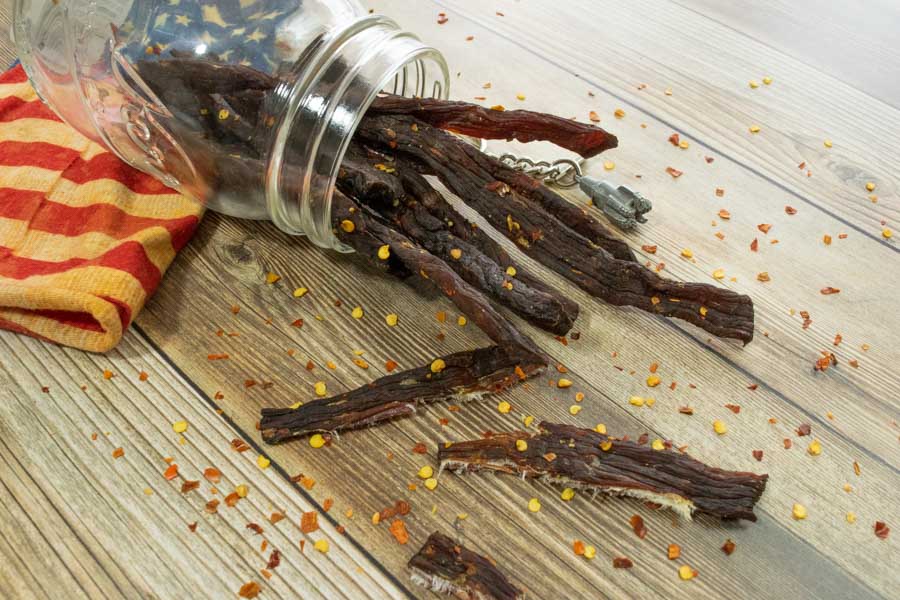
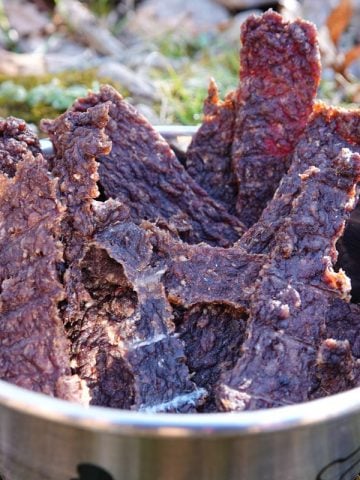
While drying the jerky, you want to start testing to see if it has finished at about the 3-4 hour mark. Take a piece of jerky out of the dehydrator, oven, or smoker and allow it to cool for 5 minutes to room temperature. Bend the jerky in half; it should bend and crack but not break in half. You will also see white fibers in the meat. The fibers are really visible when a piece is ripped in half.
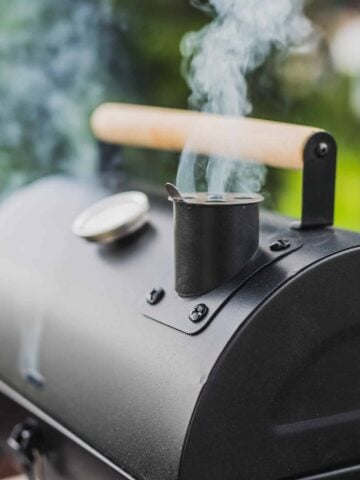
If the jerky is not finished, continue drying for another hour and repeat the same process until the jerky is finished. 90% of the jerky i make is finished within 4-6 hours when using a dehydrator or oven and 6-9 hours when using a smoker. If pre-heating the meat in the oven, drying time can be as little as 2.5 hours.
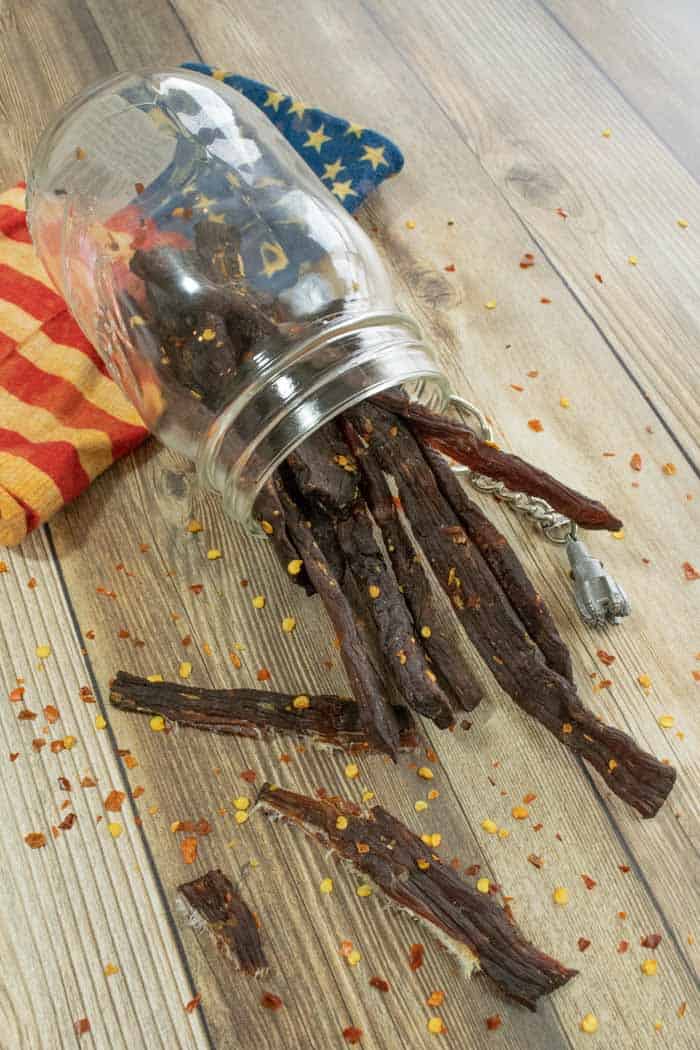
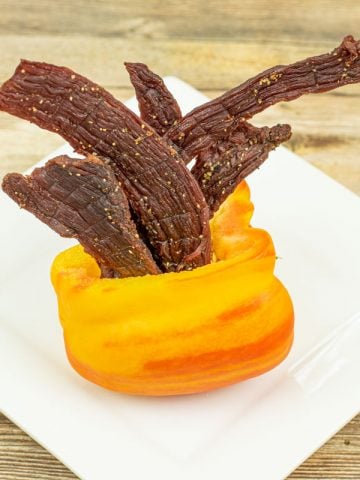
This recipe tastes fantastic, that's why there is not surprise that it is one of the top recipes on the site. It has that recognizable flavor of jerky you find at your local smokehouse or country store. The red pepper flakes gives it a little bit of a spice and the soy sauce the perfect amount of saltiness!
Storing jerky
To make the jerky last as long as possible, curing salt will really help along with keeping in air tight containers. I have put together a page on storing jerky and steps you can take to make your jerky have an extended shelf life. Check it out!
Old Pro Tips:
- Trim all fat from the meat before marinating for longer lasting jerky once it's finished drying
- Use curing salt or celery juice powder to extend the life of the jerky
- Marinate closer to 24 hours for the most intense flavor
- Sprinkle on more red pepper flakes before drying if desiring a spicier jerky
FAQ
YES! It's great for camping and hiking. Check out this complete guide to camping food and prep at Kuhl for more information.
Yes, with modification. Simply cut the liquid ingredients in half when making ground jerky.
Yes, it will turn out very well when made with chicken. Just make sure to heat the chicken jerky to an internal temperature of 165°F for safety. Check out this chicken jerky post for more information.
Related Posts


Ingredients
Lean Beef
- 1 lb eye of round
Marinade
- ¼ cup worcestershire sauce
- ¼ cup soy sauce
- 1 teaspoon black pepper
- 1 teaspoon salt
- 2 teaspoon brown sugar
- 2 teaspoon liquid smoke (Do NOT add if using smoker)
- 1 teaspoon red pepper flakes
Optional
- ¼ teaspoon Curing Salt (Prague Powder #1)
Equipment

Instructions
- Pick a lean cut of beef. Trim the fat cap and other visible fat. After trimmed, place the meat in the freezer for 1-2 hours or until partially frozen. This will allow for more uniform slices when cutting your beef.
- In a plastic container that has a tight fitting lid or ziplock bag, add the marinade ingredients and mix well.
- Remove the meat from the freezer and slice ¼" strips against the grain for an easy chew. Cut with the grain for a more chewy jerky.
- Add the sliced meat to the marinade and shake well until all slices are covered evenly. Place in the fridge and allow to marinate for 6-24 hours. Shake the container/bag two or three times while marinating.
- After marinating, dry slices with paper towels to remove any excess marinade.
- Place strips on your dehydrator drying racks with plenty of spaces in between for easy air flow. Dry with your favorite jerky making method.
- Dry for 3 hours at 165 degrees allowing the internal temperature to reach 160 degrees and then turn down to 145F. Check the meat after 4 hours and keep drying until the jerky bends and cracks, but does not break in half.
- Allow jerky to cool for several hours before storing.
Pro Tips
- Trim all fat from the meat before marinating for longer lasting jerky once it's finished drying
- Use curing salt or celery juice powder to extend the life of the jerky
- Marinate closer to 24 hours for the most intense flavor
- Sprinkle on more red pepper flakes before drying if desiring a spicier jerky

Mary
My family loves this recipe! I began using it in early 2024. Funny thing....I sent some home with my grown son and he shared some with his friend. The friend (jokingly) asked me if I wanted to get married!
Will
Ha. That's a very good compliment! Glad everyone is enjoying it.
Nancy Kontos
Rig hand Beef Jerky, Like I said have been making jerky for 40 years and wanted to try a new recipe, this was easy and Great flavor! Just enough kick to it for us, I used Dehydrated the meat, marinated for 38 hours and put it in onto the grates, took maybe 5 hours, and was it great!! used sirlion and not bad usually use Bottom round, but WAY to expensive!!! So I give this 2 thumbs up!!!! Love the flavor!!
Paul Marsico
This is the absolute best jerky recipe I've tasted. Everyone I've given a piece begs for more and later asks "when are you going to make another batch?" I've tried many of your other recipes and this is hands down the BEST!!! THANKS for creating this site and sharing all the recipes and expert tips!
Neil
I've only tried a few of your recipes, but this is my go to recipe. I've had this one bookmarked for about 5-6 years. I prefer savory over other flavors btw. I always use various cuts of deer meat and always trim out the fat. The sinew I mostly leave cause it's no prob to peel it off after dehydrating than trying when it's slippery an raw. Here's a few things I have found.
1) I use less regular salt and low sodium soy sauce b/c I also use curing salt and the cure salt tends to be a stronger salt flavor plus food safety and I'm dealing with wild game.
2) I line my gas oven with foil on the bottom( for drips). I don't dry the meat but i do let it drip dry over my sink while spreading it on the 2 cooling racks (racks are designed for baking).
3) I begin at 180-200F and reduce the heat after about 1 hour and prop the door open with a wooden spoon as needed.
4) It is impossible to make too much jerky.
5) Everyone wants you to save some for them, but the jerky tends to be gone in only a few days, so promise nothing.
6) The process has the added benefit of making my whole home smell of smoky meat.
Happy Curing!
Neil
Just to clarify, I put the baking racks on the racks in my oven for drying. If the meat sticks, I just pop them on the underside of the rack ( like bubble wrap) and voila, unstuck.
Justin
Awesome flavor and one of my favorites I’ve tried making!
JW
Added 1 tsp of Cheyenne pepper. PEREFCT!
Bill
Great recipe, I used a Masterbuilt 30 and went 11/2 hrs. at 165° then, 1/2 hr. of smoke at 190° and finally 5 hrs. at 160° to finish. It turned out perfect. I do have a question though, can I add a little water, in my next batch, to saturate the brin for a bit milder taste?
Thanks,
Bill
Will
Definitely. Feel free to change any recipe. The water will help with a milder flavor.
Anthony B.
A very good recipe base. Everyone that I have let try it has liked it quite a bit. I usually cut down on the salt a little because I go through the jerky so fast that the salt can end up overwhelming my taste buds. I would recommend low-sodium soy sauce or just omitting the salt if you tend to binge eat tasty snacks.
Justin Ferrante
In the process of marinating the Top Round as I type. My wife just purchased PowerXL Air fryer that has a dehydrator function. Do you think I should cook as per your instructions or the instructions located in their recipe book that came with the air fryer (160 for 6hrs)? Thanks in advance Will!
Will
Definitely dry at 160f, but I’m not sure about the timing using that air fryer. Start checking it around 4hrs in, then keep drying as needed.
Justin Ferrante
Thanks Will, the Jerky turned out fantastic! It was the perfect consistency when pulled at the 4 hour mark. The flavor profile was exactly what I was looking for, I did not use any curing salt in the marinade, is the only benefit to the salt for storing purposes or will it change the flavor? Again, well done...my new favorite snack!
Will
Curing salt will give it a little bit of a different flavor as well as extend the shelf life. Glad you found one you like! This is definitely a great tasting jerky.
Daniel from Georgia
I purchased a Nesco Pro dehydrator ($90), and I tried your Rig Hand recipe with an eye of round roast. I made two small alterations to the recipe: 1 extra tsp brown sugar and 1 tsp liquid smoke instead of 2. I also sprinkled with black pepper prior to dehydration. Your recipe is AMAZING. It took around 4 1/2 hours to dehydrate. Thanks for sharing! It’s better than store bought jerky and much less expensive. This is my go to recipe. Thanks for sharing!
Will
Awesome, I love hearing first time jerky success stories. Put that new dehydrator to work!
Ralph
I am going to make this recipe soon, just waiting for my liquid smoke. Just a question, if you heat up the marinade a beat until the sugar is diluted, does it make a difference?
Love your website!
Thanks!
Will
It will incorporate the sugar into the marinade better than if it wasn't heated. When it's not heated you tend to have some sugar at the bottom of the bag or bowl that you marinated the meat in, not too much though. I brought a marinade to a slight boil several days ago to mix the sugar into the marinade better and it turned out great.
Rich
I have been making this jerky for about a year now, and it is the only one I have tried from this site, or any other for that matter. It is that good, that I don't want to risk trying another. I have tweaked instructions to accommodate my dehydrator, and personal taste. All dehydrators are different, so you will have to adjust accordingly. I only half agree with the patting dry instructions. I have found that the red pepper in the marinade does not stick well or evenly to the meat after removing. Plus, I like a little extra heat. So, I put the marinated meat on paper towels, and DON"T pat them dry, effectively drying the bottom half only. The wet meat on top acts as a glue for a sprinkling of some additional crushed red pepper flakes.
Chris
This is my favorite recipe! Thank you for creating it!
Will
No problem! One of my favorites as well.
Lisa
What about an infrared thermometer?
Will
It will only tell you the surface temperature and not the internal temperature.
Lisa
Ahhh... darn.
Tracy Walker
What kind of thermometer can display the internal temperature of beef jerky? When it's thin and dry I can't think of one that would be able to do this.
Will
Trying to find one that will tell the temp of dry thin jerky is hard. normally taking a food thermometer and wrapping the thinnest piece of jerky around it will give you a pretty close number. I am looking into some real small food grade professional thermometers though. I'll try to make a post about them whenever I get a chance to get one.
Shawn
This flavor was awesome.
Do you have a recipe close to this one that you can use for ground beef? I know with beef you want to stay away from liquid so it's not exactly a marinade. But this flavor duplicated for dry ingredients would be awesome to try.
Thank you for the recipe!
Will
You can use this recipe, but cut the liquid ingredients in half. Use only 2 tbsp of soy sauce and 2 tbsp of worcestershire per 1 pound of meat. That shouldn't be too much liquid and the jerky should come out tasting just as great!
Shawn
beautiful, thank you!
Shawn
Hello,
I took a shot at making jerky for the first time tonight.
My dehydrator of choice is the Nesco FD-75A
My meat has been sitting in marinade for about 48 hours.
After draining/dabbing off the excess marinade, I have placed the meat in the dehydrator. It dried for about 4 hours. I was struggling to get the temp above 130 degrees, but the softness/chewiness was where I wanted it. So I removed it from the dehydrator and placed it in the oven on 300 for about 10 minutes to bring it up to a temp of around 175-180.
Now I am nervous about it. Although it's up to temp, when I squeeze the jerky with my fingers, the smallest amount of oil/moisture comes out. I read if there is ANY moisture, it's not done. I have had a number of pieces already, and although it tastes good and I like how it turned out, now the moisture has me concerned. Especially after I ate some.
I know everyone is different, but how much does it take for one to get sick from eating jerky in said condition? Should I be worrying?
I read that you can pre-cook or post-cook the jerky to get it to the temp you want. which I did the post cook method.
Can anyone ease my mind or do I need to start pumping my stomach? sigh, I thought I was doing everything right
I would like to add. I just placed the jerky back in the oven, again. 300 degrees for like 10 minutes. this time there seemed to me a lot of oil/water or marinade on the baking sheet. and it was sizzling. so obviously it is still cooking out the moisture. but at this point, they are becoming close to burnt sticks.
Will
The pre-heat method is better than the post-heat method, but it should be fine. What cut of meat did you use? How thick are your slices? It could be fat/oil from the meat that is coming out. The only way to prevent that is to trim as much fat as possible before marinating and choosing a lean cut of beef to use. It is okay if there is a little fat or marinade on the jerky, it just wont last as long as a really dry piece. If you tear a piece and see white stringy fibers, the jerky is finished.
Shawn
I used eye of round filets that came pre packaged. I'd say they were about 1/4" thick, then I sliced them into 1/4" strips. This week I think I'll try wider strips, but still maintain the 1/4" thickness.
I will definitely try the pre-bake method this weekend.
thank you again
Mark
Will,
Read all the rave reviews on your Rig Hand Jerky. Now I know why it’s in your top 5. INCREDIBLE!!!!
By far, the best Jerky I have made yet!!!
The best way to describe the taste is, It’s like biting into a Slim Jim. Been trying different recipes from your book. You were right. This Jerky didn’t last long. Thanks again for the book and all your recipes.
Will
This is a good one! Glad you are enjoying the book Mark.
kerry corcoran
Turned out perfect!! So damn good!
Thanks for the site, inspiration and the help!
Kerry
Will
Nice! No problem Kerry.
kerry corcoran
Stumbled across your page and was inspired to try my hand at making jerky. I have purchased all the ingredients and the Nesco FD-75A.
For my first patch I will attempt to make the Rig Hand Jerky. My question is, the recipe calls for "1 tsp salt". I also purchased the Curing salt.
Am I to use the curing salt in place of the regular salt or use both (1 tsp salt and 1/4 tsp curing salt) if I have both?
Thanks in advance.
Kerry
Will
I would put 3/4 tsp of regular salt (table or sea salt) and then 1/4 tsp of curing salt. This would be the amount for 1lb of meat. Make sure to double check your curing salt amount per 1lb on the container you bought. It should be about 1/4 tsp per 1lb though.
kerry corcoran
I purchased the same curing salt you recommended, so should be all set. First batch is in the Nesco right now. Fingers crossed!
A question I had, ithe recipe calls for 4 hours @ 160 degrees - is that for a single pound? I am making 2 lbs (or Rig Hand Jerky) - do I need to dehydrate for 8 hours?
Will
The drying time should be about the same even though it is double the amount of meat. Don't just dry for 4 hours and call it good. Drying time depends on thickness of meat, dehydrator, how many trays you have in the dehydrator. I would pull a piece out and let it cool for 5 minutes at the 4 hour mark. Bend it and see if it cracks and has white fibers. If not, keep it going for another hour and check another piece. Once it's done, it ready to eat!
Lisa
Hi Will! I am new to Jerky making and having a great time at it. Thus far, I have made your Sweet Spicy Jerky, the recipe in the booklet that came with the dehydrator and the Rig Hand Jerky. The Rig Hand is my favorite!! I have a couple of questions...
1. I bought Wright's Hickory flavored Liquid Smoke. They also had Mesquite flavor and a couple of other brands in which it was just called Liquid Smoke. What flavor does the recipe call for? The smoke flavor seems to be very pronounced (I don't hate it, though), would you recommend to decrease the amount of liquid smoke if a flavored one is used?
2. I just bought a cheapo Presto dehydrator (to start) that you just plug in and it turns on and goes to 165 degrees for the duration. I have been using Top Round beef that the butcher has pre-sliced for me against the grain, closer to 1/4" thick. At 4 hours, they seem to be done (bending, white threads, not breaking). Then I bake in the oven at 275 degrees for 10-12 minutes until the pieces are sizzling. My question is this: what happens if you over dehydrate the beef? Is that when it breaks when bent? Is it possible to take less than 4 hours to be done in the dehydrator? I apologize if these questions are dumb, but you warn against the Jerky not being safe so I just want to make sure I am doing it right.
Thank you for your most awesome site. I cannot wait to keep trying your recipes. Happy Jerkying!!
Will
Hey Lisa, thanks for checking out the site! Wrights liquid smoke is definitely the best brand to buy. When I first made this recipe I was using a lesser quality liquid smoke that requires more. If using wrights, use only about 2 tsp of liquid smoke. You can totally change and try different flavors. I like the hickory, but mesquite is good as well. The best thing to do is experiment with different flavors and find one you like. To answer your second questions; yes, it can take less than 4 hours for the jerky to be finished. When it is over dried it will break and just taste extremely dry. If you are having the meat sliced very thin, start checking it at 3 hours.
Lisa
Thank you so much, Will! I appreciate it! Off to the market to get the mesquite liquid smoke - it's on sale and get some more meat! Who knew making your own beef jerky is so satisfying and delicious! Best to you!!
Mark Bradshaw
Thanks Will! I'm using the oven because I can hang about 4 lbs with toothpicks , and, well, I'm too lazy to fire up the smoker today... Your recipes have become a regular thing for me. Driving truck and eating right is a hard combination. With jerky I can have my PFC snacks between meals without missing a beat. Thanks again for taking the time to share and for the straightforward guides and recipes.
Will
No problem Mark, glad the site has been helping you when making jerky. Thanks for the kind words!
Alyssa
Hi Will,
I noticed on your dehydrator review it says the NESCO takes about 90 minutes to get to 160 degrees. Do I need to pre-cook the beef I want to dehydrate in my NESCO or can I just go straight to the dehydrator. Thanks!
Will
I go straight to the dehydrator when using the Nesco.
Tim in Indy
LOVE the Rig Hand! I've already done 2 batches in my Masterbuilt, first one was dry (live and learn...we still ate it) and the second was pretty close to spot on. I'll be doing another batch soon with some tweaks. Thanks for sharing your knowledge and recipes, it is greatly appreciated!
Will
This is a really good one. Glad you found one that you like!
Jim in sandusky
After marinading meat for the first batch of jerky, can I re-use the marinade?
What are your thoughts of freezing meat for an hour, slicing up into strips, adding the marinade, and bagging it in freezer bags for future drying at a later date?
Will
From a safety standpoint, it is not recommended to re-use a marinade after you have marinated meat in it. I have never frozen meat in a marinade for future use but don't see why it would be a problem. Before freezing, I would let it marinade in the refrigerator for at least 8 hours and then put the bag in the freezer. That way it is ready to go as soon as it thaws.
Danikay
Hi! Our 9 year old daughter wants to make jerky for her father's/ my husband birthday next week. Just wanted to let you know that after reading your posts I'm excited too. And very grateful for all the tips. We'll let ya know how it goes.
Will
Nice! Looking forward to hearing about it...
Grady McNutt
Great song. Listen to Corb Lund Roughest Neck Around.
Will
I'll check it out. Thanks!
garth
just trying ur rig hand jerky im a ex rig hand from Canada how deep is that triple in Wyoming rated for
Will
Nice man! Not sure how deep. I flew up and filled in for someone while on the surfaces' for 8 wells. I can't remember how deep they were going, it was a while ago! I'm in Oklahoma right now on a Patterson rig. We are going about 10,000 tvd and 22,000 md, drilling with OBM. Can't complain....
Anthony Zelina
Hey there Jerkyholic, just made the rig hand jerky and boy let me tell you what flavor! what I really noticed was that the flavor lasts all the way to the very end.
Thanks for sharing your recipes !
Gayle Dunning
I would like to smoke this recipe in my propane smoker will the 4 hours be the right amount of time? I have a hard time keeping the temp down @ 160 if there's any wind. I've done antelope jerkey in a gas oven but alas my new electric oven only goes down to 170 °
Thanks
Colorado Grandma, whose grandkids love her jerky!
Will
Hello fellow Coloradoan! When it comes to smokers, the time can vary sooooo much. My electric smoker normally takes closer to 6-7 hours to dry. I am able to keep it around 160F when drying. You really are going to have to take a piece out starting at about the 4 hour mark and keep checking to see if it is done. It should bend and crack, but not break in half. Make sure to let it cool to room temperature, about 5 minutes, before bending it. Let me know how it turns out Gayle!
christina
I love this rig hands recipe! It’s going to be my go to for jerky. A question though, my husband likes his jerky cut about 3/8 in, how long would I need to let it go in the dehydrator?
Christina
Can this recipe be used with ground meat?
Will
Yep, it can. I would just cut the soy sauce and worcestershire sauce by 1/4; add a little less so the meat isn't too wet.
Anthony Zelina
love this site! i also have a 9 tray excalibur. aside from the bend test, how can i properly check doneness>???? looking forward to trying rig hand now, been winging it with teryaki, worschestire, brown sugar and liq smoke... when do we use vinegar and other stuff. ideas on creating my own marinade? no cook here, just experimenting. tried using an ipa beer in there to no avail. thanx, great site will
David
My co-workers love this stuff. So far I've made 3 batches of this stuff at 10 pounds per batch. My only tweak is instead of using 1 tsp of salt per pound, I use 1/4th tsp of Prague Powder #1 per pound.
I cut it into 1/8th inch strips with a meat slicer and marinate between 24-36 hours in the refrigerator. Using an excalibur 9 tray dehydrator, I start off at 160 degrees for the first 2.0 hours. I then scale the heat back to 125-130 degrees for the next 2.5-3 hours and check every 30 minutes or so.
Side note: Contrary to online opinion, if you use a food saver you're able to save this stuff in the freezer for up to six months (or more). I recently pulled a four month old pack from the freezer when I made my last batch. After de-thawing to room temperature, there was no difference in taste or texture to myself and co-workers when eaten side by side with a fresh never frozen batch.
Will
I love this recipe too, one of my favorites. I appreciate the info on the taste test, very interesting! I also vacuum seal and freeze jerky if needed, though most of my batches are small and eaten pretty quickly. But there are always a couple of occasions a year, like hunting trips, that I make a bunch. Thanks for coming by David!
Marc
Made my first ever batch of jerky with this recipe (minus the extra pepper flakes after marinating) and it was amazing! Thank you so much for this site!
Will
Glad you liked it. One of my favorites!
Eric
Hi will. Question for you. If I have this right no matter what I marinate the meat in or wether I use regular salt or pickling salt or any of your recipes. I can cut the meat in thin slices. Marinate for 8 to 24 hrs. Not use any cures. Cook in the oven for 10 minutes or so at about 300. Pat dry. And dehydrate. As long as the meat reaches 160deg post dehydration.
Will
As long as the meat reaches 160F Pre dehydration. Yes, just like you described above.
ken
I've been working with this recipe to figure out some nuances that seem to work for me. I use a smoker and either apple or hickory (hickory has a harper flavor). I don't use a dehydrator but my gas oven. This allows me to keep the meat from drying too fast. There are a number of mechanical tenderizers that are helpful depending on the cut of meat (usually eye of round). I don't add extra salt since there is a bunch in the soy sauce and the worchestershire sauce. Instead of brown sugar I add molasses. When it's finished. it's hard not to make a meal out of it. Ok, I have made a meal out of it once in a while.
Denise
I have made several different batches of jerky using different recipes. Your Rig Hand recipe has been the favorite with friends, family and co-workers. I have a batch marinating now. Your website is GREAT. I didn't know anything about making jerky. Found everything I needed to know right here. Thanks a million.
Will
Glad to hear that! I'm so happy that my site helped you get into the world of Jerky making. Thanks for coming by and leaving those kind words!
Eric
Just found your site. Got a dehydrator about a year ago and am finally putting it to use. Making two batches today. Rig Hand and free styling the other. Can't wait to taste the results
Tyler
Hey!
Im cooking about 1.8 pounds of beef in the masterpiece smoker like yours, but my jerky seems to be getting done in ~3 hours? I think my cuts are a little less than 1/4 inch thick. Suppose that's the 'problem'?
Im using the 1.5 hour @170
30 min @200 (smoke)
then back to 160 for the remainder (about 1 Hour)
Excellent tasting recipes, did 1/2 Rig Hand 1/2 Basic jerky. Flavor on both is amazing.
Will
Hey Tyler! Glad you enjoyed the jerky recipes. I am not sure why it is only taking about 3 hours for you to smoke your jerky. My smoker takes quite a while, at least 6 hours for my jerky to finish. I have some jerky finish in my dehydrators around 4 hours, but have never had my smoker dry jerky that fast. It could be because the meat is sliced real thin, either way, as long as the jerky is finished there isn't a problem! Just keep making that good jerky!
Christopher
Just took 2lbs of rig hand off the dehydrator a few hours ago I received ia dehydrator for Christmas and I must say rig hand had has got a fair spice to it but so far it's the best I have made yet I used select sirloin from Schnucks market where I work our meat is rated the best around here and I must say it made some darn good RIG HAND
Mike
Thanks for a great site!! I've made seven or eight of your recipes and the Rig Hand is the one I keep coming back to. Outstanding jerky. I do add my little touch though...in addition to your ingredients I also add about a tbsp of cayenne pepper and about 1/2 tsp of cumin. I use Eye of Round sliced 1/4" cross-grain by my butcher. When I lay the meat down in the dehydrator I give each piece a quick spray or two of non-stick cooking spray and sprinkle a little black pepper on one side only.
BTW, my wife bought me a new Nesco FD-2000 dehydrator. While I do find I need to rotate the trays for even drying I really do like it. Digital, temperature control and timer. Check it out! 😉
Will
Glad you like the recipe. That is one of my favorites as well. I will have to try it with your tweaks and see how it turns out! Nice on the new dehydrator, I love getting new jerky equipment. I'll have to check that model out, timers really come in handy when you make a lot of jerky.
Doretha Curlee
Nice read, I just passed this onto a friend who was doing a little research on that. And he just bought me lunch because I found it for him smile So let me rephrase that: Thanks for lunch!
Will
Great! Enjoy the lunch!
Blake
This was my favorite of the 3 I tried this weekend (Alton Brown and Sweet Coconut). Great recipe! Also, my first time using eye of round, and it's my new fave.
Mike Wolf
Hi Will,
gonna make my first batch of jerky tonight/tomorrow. I am so glad I found your site. My dad makes great jerky but he is 1000 miles away (though he did by me the dehydrator) so I can't have him looking over my shoulder helping me out on this. So I turn to you. I am using 2lbs of beef for your Rig Hand jerky. Do I simply double the ingredients in the marinade?
thanks for the help and thanks for the amazing site. I am gonna try as many of these as I can.
Mike
ps: I love Duke's brand jerky. My girlfriend was near Las Vegas recently and she dropped a lot of dough on Alien Fresh Jerky. If you haven't had it, i recommend perusing their catalog for some ideas.
Will
Thanks Mike! Glad you are enjoying the site. I would just double the recipe if you're going to make 2lbs of jerky. Taste test the marinade before putting the beef in as well; this way you can tweak it to your liking if needed. Alien Fresh Jerky? Never heard of it... Sounds pretty interesting though. I'm definitely going to have to check that out! Let me know how your jerky turns out.
Mike Wolf
Hey Will,
First batch done. It came out a bit salty for my personal tastes (Rig Hand recipe) but my girlfriend was very impressed, which was kind of my goal in the first place! Gonna try your cajun recipe this weekend.
Here is the website of Alien jerky. We killed the bag of traditional Pepper style in one sitting, and then the Colon Cleanser nearly killed us (super spicy).
Thanks for sharing your recipes to us dehydrator noobs,
Mike
Mike
Mike
FYI, there's a little business out in the middle of nowhere (if it's still open) in Nevada at the junction of Hwy. 93 and 318/375 just north of Alamo, NV. I pass it it a couple of times a year. Pretty sure the "alien" jerky is a play on Area 51 which is not too far from there. Though I've been tempted, I haven't tried it...yet. 😉
Steve
Hi Will is the Liquid Smoke proportion correct? The only brand I know is Wright's and it is concentrated - 2 tbsp seems like an awful lot. Thanks
Will
Thanks for stopping by Steve! I have never used Wright's liquid smoke. I use Colgin, and 2 tbsp is not too much at all. If you are worried that 2 tbsp would be too much when using Wrights, start with 1/2 tbsp and keep increasing the amount while taste testing your marinade until it's perfect. Let me know how it turns out!
Mike
I've used 2 tbsp of Wright's with every batch of Rig Hand I've made, including the one today, and it's PERFECT!!! At least by my standards. 😉
Rich
The ingredients list calls for 2 tsp, any you guys are talking 2 tbsp. Please clarify, is it tsp or tbsp?
Will
The initial recipe years ago called for 2 tbsp of liquid smoke. I have remade the jerky with wrights liquid smoke (more concentrated than Colgin) and have adjusted the recipe to 2 tsp.
Aaron
Just made this as my first attempt at home made jerky, and it is awesome!
So much flavor, and so much softer than the stuff I normally buy.
I recently inherited a dehydrator, and wanted to play around with what I could make.
I can't wait to experiment with more flavors and recipes!
Will
Glad you liked it Aaron, I really like this recipe as well. Thanks for stopping by and leaving a comment. With that new dehydrator, you have now entered the world of making Beef Jerky; there is no turning back now. Haha.